Sunday, December 18, 2011

Anemometers to Accelerometers, Dan's Project In A Nutshell

My first attempt was to make an anemometer myself. I had heard that there were numerous ways to do so using the sensors from old computer mice so I got some to experiment with. The sensors are activated by small pinwheels in the mice which read the speed of infrared light going through them which is used by the microprocessor in the mouse to tell the computer which way the mouse is moving. My plan was to remove the sensor and use the signal that would otherwise be sent to the mouse microcontroller/computer to send a signal to my Arduino.

But first I needed to create something to catch the wind.


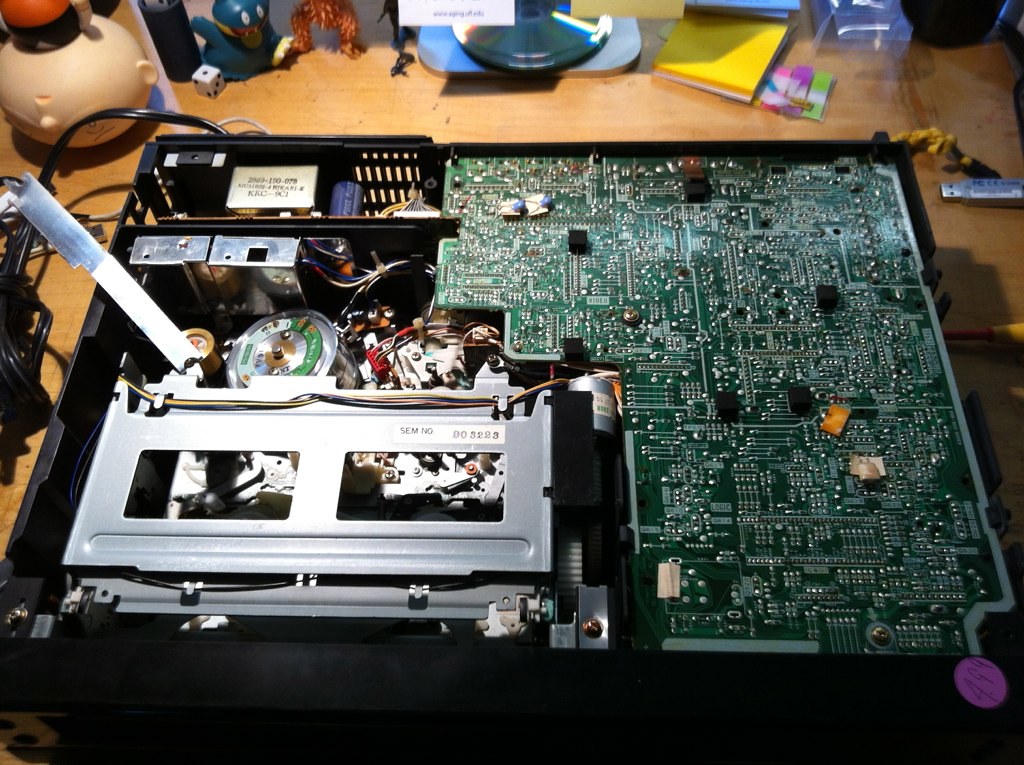
I took apart a VCR to get to the tape head which had ball bearings. I thought that would help make a smooth anemometer. 


Next I took some plastic spoons and attached them to a chopstick in an attempt to make something to catch the wind. I tried a few different combinations with the spoons and the three spoons at about 30* angles worked best. They spun well when I held it in my hand and blew on it but I had some trouble once I attached it to the VCR head.


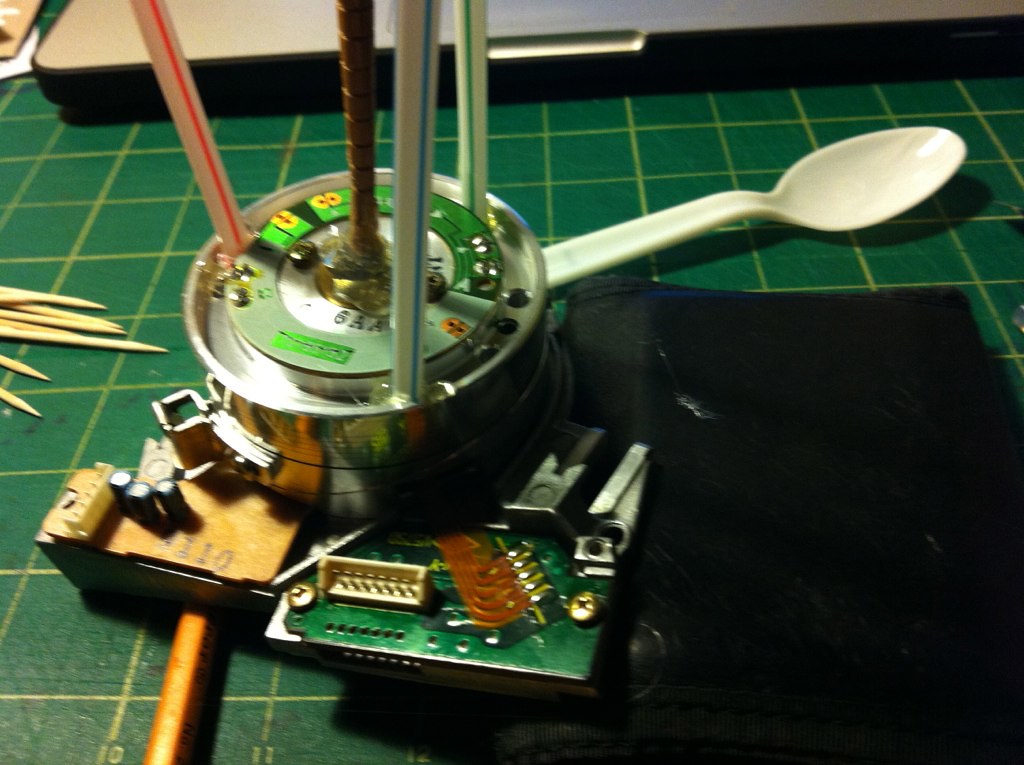
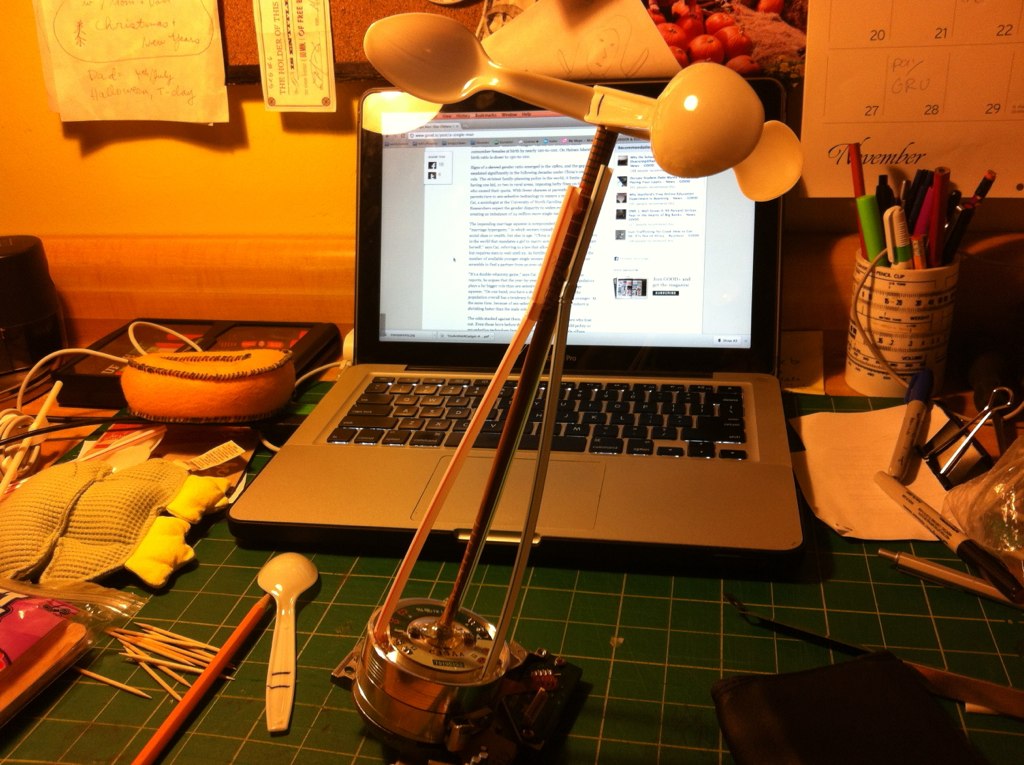
Not only was it difficult to get it to stand up straight (despite trying to brace it with straws... which seemed like a good idea at the time) but the friction of the bearings was too much, even when using a box fan on it's highest setting to try to make it turn. I was back to the drawing board :(

One of the mice I go was newer and had a scroll wheel on it. I tested out the rotary encoder which made it work and the results seemed promising.


but once I attached the chopstick/spoon combo the same problem was there... too much friction to get a reading. I looked into reed switches as well, but none were available in the supplies room and I wouldn't be able to order them in time. Plus there was still the issue of how to deal with the friction of the device.

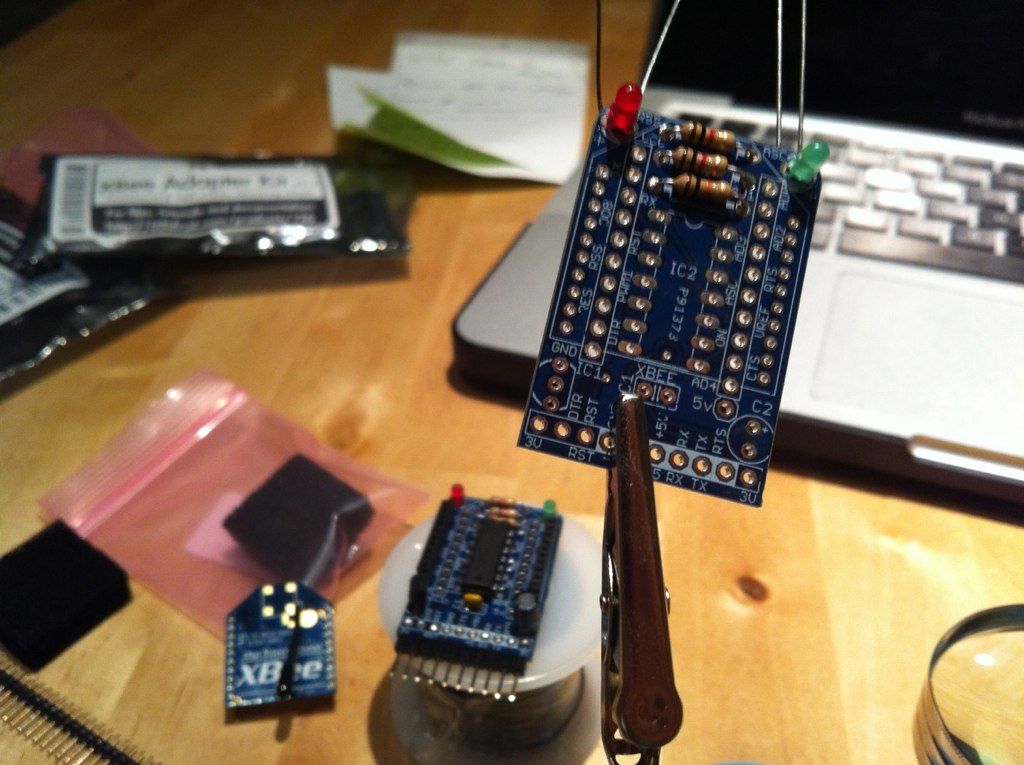
Meanwhile I built a couple of xbee adaptors since I wanted the piece to be wireless


but unfortunately had to put that aspect of it on the backburner so I would have enough time to figure out a way to make my project work.

As I was walking to lunch, frustrated that I couldn't get my anemometer to work I walked past some monkey grass and it hit me


I could get a reading from the wind if I used an accelerometer on some flimsy grass-like object.

First I tested the accelerometer with a motor.


This worked ok, but I was concerned that the reading from the accelerometer wasn't translating very well to the motor, not only physically but conceptually as well.

In my search for a suitable alternative for the motor I came across a quote by the naturalist and author John Muir.

"The substance of the winds is too thin for human eyes, their written language is too difficult for human minds, and their spoken language mostly too faint for the ears."

This quote inspired me to look into a way for the accelerometer to trigger some drawing device.


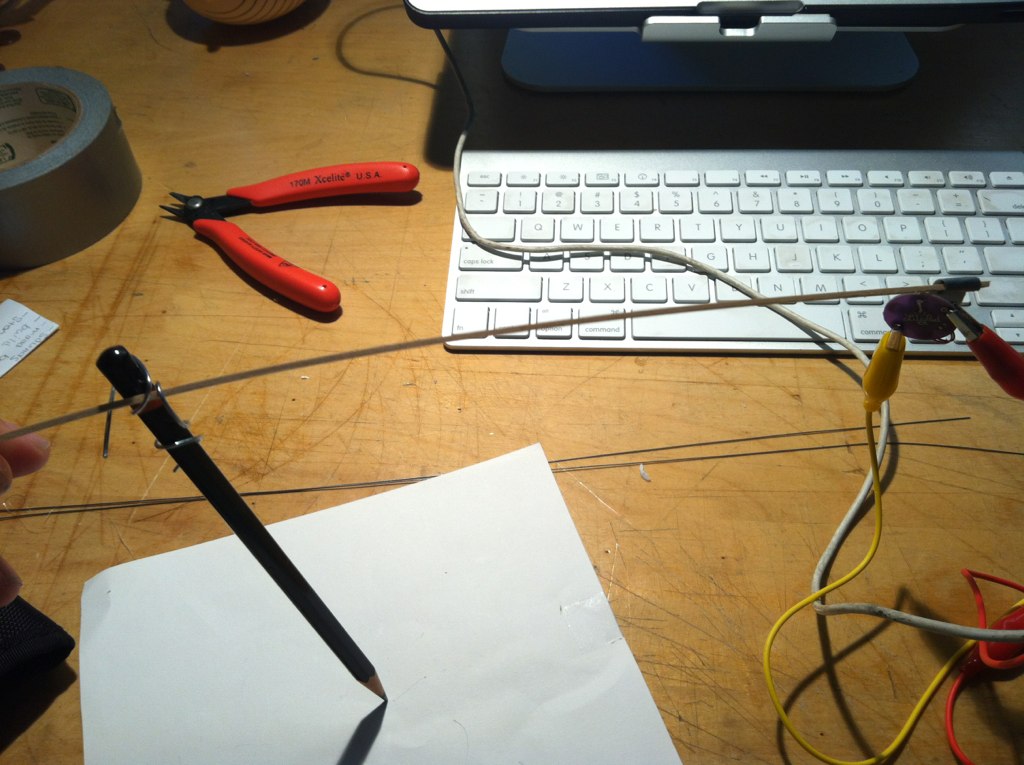
Using a vibrating disk attached to a wire and pencil didn't work so well so I thought about what drawing really is, mark making.

I decided to make the paper vibrate with pencil shavings on it. I tried several different options for what to make vibrate but I liked my first idea the best.


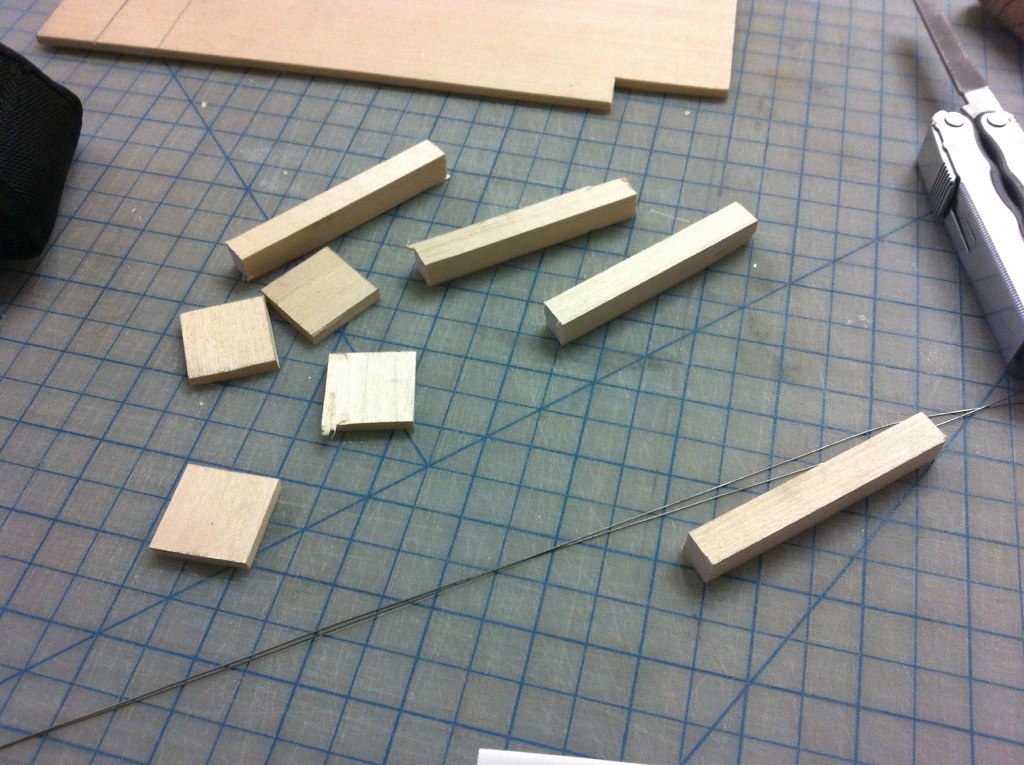
Then I built the structures to house the accelerometer and the vibrating disk. 


The disk was going to be attached to a middle support beam but I got better results when I taped it directly to the wires.


Left just on the support the paper would fall off.

I added pins. 


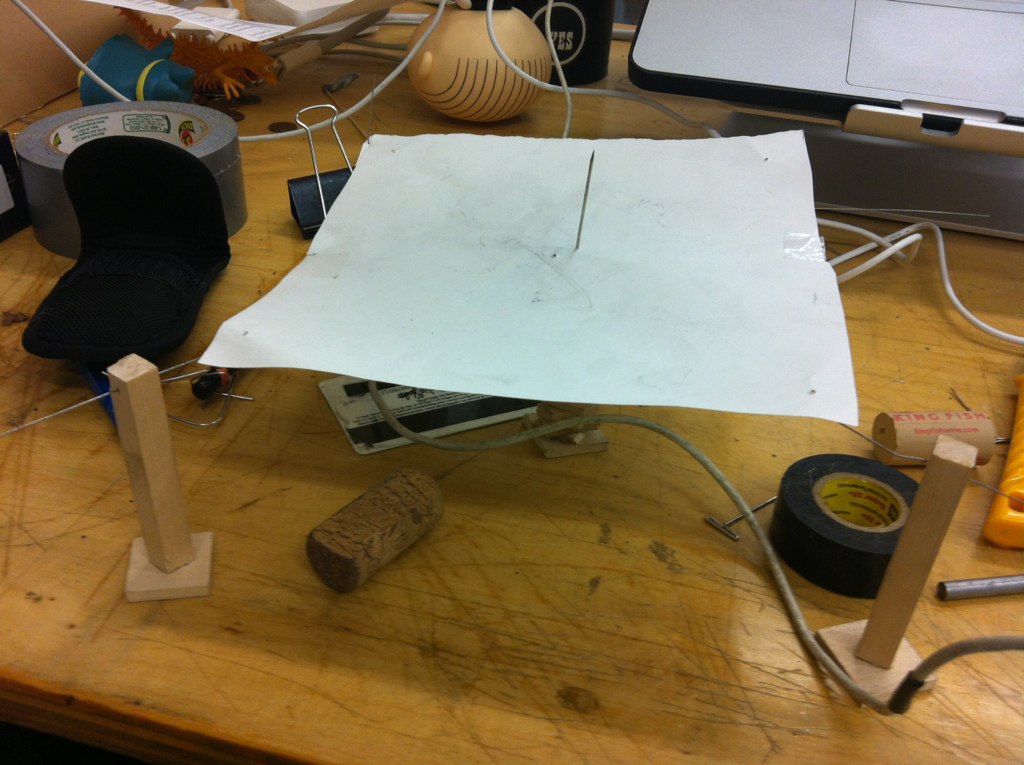
I worked on the accelerometer structure as well.


The code was a simple analogread from the accelerometer with a constrained output to an analogwrite so that the output would accurately reflect what would happen when the sculpture caught some wind.

I couldn't get the xbees to work so I ended up using a box fan for my final project. Ultimately I was pleased with how the project went. I redid a few things after the crit like adding paper to the sculpture to catch the wind and modifying the paper on the vibrating disk with scores so that the movement of the pencil shavings would be different.


A lot of my stress and toil surrounding this project might have been resolved much quicker had I actually bought an anemometer and simply used it's output to power a fan, as was my original concept. But then I probably wouldn't have learned as much about the processes and numerous ways that one can track wind power and through that experience I feel that my final project became much more complex, at least conceptually.


Pressure Sensor and LCD Screen


Although I could get a reading on the serial port of the pressure sensor, I could not manage to get the second part of the assignment to show any changes on the lcd screen, even after leaving it there for over 30 minutes.


Jim Campbell, Memory/Recollection


I am writting about Jim Campbell's installation called "Memory/Recollection". 
http://www.jimcampbell.tv/portfolio/installations/memory_recollection/

I think his use of lo-fi materials (security cameras and grainy monitors) and still imagery of the physical space which the work is installed is quite interesting in that it utilizes many of the visual cues that you would find in cinema yet breaks them into disparate parts to make a narrative with no plot. 

As you enter the space the camera captures your image and you become a part of the fleeting narrative on the screens. By incorporating the viewers of the work into the work it breaks the traditional models of viewing a work, especially a video based piece. Simultaneously it also breaks the trickery of many surveillance style works such as the installation work of Bruce Naumann where the use of the camera is revealed only after you reach the screen at the end of the hall. Here all is laid out, front and center, an atypical placement for security style video equipment. 

The title of the work however make me rethink the materiality of the camera, screens and placement. Perhaps Jim wants the work to be more than a video piece, maybe it is a critique of art itself. Here the viewer is explicitly put into the work, and through the delay of the image, for a short time, they too become the work. Their image sits still, so it is not a purely video work, and the motion and movement of their image from left to right and then gone evokes the scientific studies of Muybridge's athletes and animals from the turn of the century.

Memory/Recollection is a complex piece and the way the piece works between the space of installation site, the viewers of the work, and the work itself is fascinating. It is as though the viewer is drawn to the piece as a moth is to a flame and in viewing it their image is consumed, replayed and destroyed. 

Tuesday, December 13, 2011

Mona "Diva" Aftermath

So I was overall just relieved that this project WORKED. I had a bit of a bumpy road just trying to do that, but it worked- yay! The components I worked with were very simple- mostly because I didn't want to bite off more than I could chew with my experience level. I felt like a lot of the feedback from Crit were things I could have added to the piece to create more of a presence, or atmosphere. I thought the feedback was very helpful- it was also especially nice to have Michelle Tillander there, as she is my teacher for my education courses. I think with more time I could have definitely added to the project (isn't that what everyone says), The only thing that really bothered me was the speakers. I really wanted this piece to be wireless, I had all of my components encased in the frame and originally the speaker created sound like it was coming straight from Mona's mouth. The speakers on the floor were a last minute fix so that everyone would be able to hear the audio better.
I might have gotten a slightly bigger frame, had I been able to find it in time.
I'd love to do more of these, and maybe have them sing and talk to each other. That was a good suggestion.

I also feel the need to reflect on this project in terms of the entire class as well.
I'm just kind of proud of myself, I would not have been able to do anything like this 3 months ago- as it was, I was extremely confused and lost when I started this class. I've gradually figured out how things work and become comfortable with electronics.I think it might have taken me longer than others, but I feel good that I did learn a LOT. I chose digital media as my concentration because I enjoyed what I did know how to do, and wanted to learn more about things I didn't know much about. I want to take this knowledge and apply it to the classroom, with this knowledge I have something most other teachers do not.

P.S. I even used my knowledge to create some LED light up Christmas Ornaments. Extra Credit! (Just kidding) But it's proof of how I'm already applying that I've learned outside this class. :)

Here's the Youtube version of the song

Even More Videos!

Documentation of Dan Dan and Lu's piece


Documentation of Dan's piece


Documentation of Renate's piece

More Videos from Crit

Documentation of Lin's piece


Documentation of Sam's piece


Documentation of Netalia's piece


Documentation of Dailey's piece

Final Project Presenting


Monday, December 12, 2011

Argus Videos for Final

This first video is a behind the scenes look at the wiring


This second video is what the project looks like in the light


This third video is shown how I intended it to be seen: in the dark


This fourth video shows how the user can interact with it

Sunday, December 11, 2011

RFID chips and Touch screen

RFID chips

Touch screen

Please Crit! Kelsey's project actually working.

So the dealio is, the viewer is meant to approach St. Lucia, a disengaged figured and the only source of light in a dark room. The viewer takes from her proffered bowl, dark fleshy raspberries that resemble eyeballs. The viewer ingests the raspberry and touches the piezo speaker which blows the candles out and 'blinds' the viewer.

The image of Lucia has been in my subconsciousness since I was young, reading Swedish literature given to me by my father. As the artist I am now, I am always interested in customs found in popular culture; things like the glazing over of facts, sweet foods as a communal trope and organized religion is fascinating, and I find myself often attempting at subverting it and recreating it a way that brings the roots of the custom to light.

In the case of St. Lucia, she was martyred by getting her eyes gouged out, hence she is the patron saint of light. On December 13th European countries, mostly Sweden and Italy celebrate St. Lucia's holiday by singing and processing and handing sweets to viewers. Sweden actual has a full hour special of music and performance in celebration of St. Lucia and the whole holiday has been completely secularized.


I wanted to film in the black box, but because of finals it was constantly in use, it definitely is a little cheazy with the white apartment trimmings, so I'm sorry about that!

Kelsey Process work cont'd

I started again from scratch, building a full prototype on the breadboard before I built it, going off the same plans as previously. It still acted finicky after I soldered it, but  I positioned it around and got it to work steady . The ultra white LED's came off sort of "rave" instead of traditional lightbulb.


Saturday, December 10, 2011

Final Crit

Here is some documentation from the final crit:

Final, Bunches of Video Process Work

Crit Day Movies

These are a couple of videos from crit day.

Final critique thoughts

For me, this was overwhelmingly successful. This has been the one project where everything I've done has gone smoothly and fallen into place. I will definitely, definitely show this work again with some modifications.

First off, my concerns with hardware are that the motors while the worked for this, could be stronger. In the future, I plan on ordering some larger servos. As far as the rope, people suggested that I use velcro to secure it to the motors. It would actually be possible that way to "break" the rope and win the tug-of-war, but still be able to put it back together quickly for another go. Another thing to consider was the height at which the platforms were. They ended up being torso height, but with the interactions between the two people at either end, I think that it might be more engaging to build custom platforms at almost face height so that one could see their opponent.

I think I may also want to include the previous video installation I made with this tug and pull quality. Somebody even suggested that I use sensor input from the ultrasonic range finders to control the video in tandem with the motors, so that the tugging could be on several dimensions. It's a possibility but I'm not completely positive about it. There really are a lot of variations for this project. I'll definitely be revisiting it later.


Friday, December 9, 2011

Final Project Update

Here is some rambling thoughts that I was having about the project. That I wrote into a word document over the weekend. More updates, videos and links will be following as soon as I can get the time and find all the documentation on this computer.


“I Do Not Understand You”

The initial idea of the project was an exploration of communication and the understanding between people. The interaction that goes along, the nature of technology as a medium to communicate as a focus. The focus and the thought was also to explore complex scenarios and see that from a third perspective that answers were obvious or that what was attempted to be said is obvious. That technology would enable and disable the communication process. That translating what something means and is said can be achieved if only seen in a certain way or light. Some things just don’t work. The biases and exploration of cultural differences continued to play a role. That technology and different forms of communication has their advantages and their weaknesses. That for instance the subtle hints or body language is lost in translation when someone is sending a text. That in theory it is impossible for anyone to fully understand and communicate exactly what they mean. That there is something always left out even when being direct the subtle auxiliary information that came to the various conclusions or reasoning to draw upon are seldom known by the audience. These factors cannot be all known and then the complexity for what the other person draws on and brings to the table of communication adds even more complexity to communication. In essence from the various research and thought and observation of communication is very complex and hard to fully grasp. A communication fully and perfectly is dang near impossible for one to achieve. “What we have here is a failure to communicate.”
The research proved a doubting proposition in exploring or showing this complexity of communication. What was determined to be needed is to simplify to look up and see what are tools to clearly communicate a message effectively and understandably. Concise, direct and relatable were the goals in creating such a piece of art, for public/private consumption, along with the goal to obviously learn something greater than oneself and grow as a human. The notion of talking and discussion while hinting at the idea that technology can be a disabler was deemed to be discussed. After a failure on many things with the original idea and the secondary idea and the third attempt the final piece was conceived and worked out to totality.
The piece illustrated the saying “I do not understand you” being play via audio to the viewer once a card was swiped over a certain location. The cards would be a digitalized stereotypical image of a nationality and the audio would be a stylized technological accident for the nationality depicted. The purpose would be the notion technology and a social commentary on our reactions to stereotypes and how they can be drawn into technology. That the voices were computerized digital auto created programs when certain text was added. The goal is to simply evoke questions of how the world is connected via technology and the common currency we all have and misunderstandings that can be developed between various people.

A huge chunk of classwork

Here's all of the leftover classwork that I haven't posted to to blog, UNTIL NOW.

A photo of the touch screen setup


Here's an image of the SD card Reader


and some videos


Thursday, December 8, 2011

final project documentation


I measured around the pot, and marked where the seven photocells would go. Then I drilled small holes for the leads, and pushed the photocells in. Then I put the Mega inside the pot, and plugged in the USB and power cables through the holes at the base of the pot. Then I wired all of the photocells' power leads together, and plugged them into 5V. Then I wired all the negative leads to their own resistors, then to a common wire to ground on the arduino, and also each negative lead to its own analog input pin on the arduino (so each photocell has a pull-down resistor). All of this reaching into the pot to reach the mega was very difficult. Unfortunately there are no photos of these steps, since I left my camera at home. Then I tried using gorilla tape to secure the motors, but it wasn't strong enough, so I used hot glue. They all fit, just barely (huge relief, as the wiring for the photocells had taken hours to do). Then I connected all of the motor power leads together, then to the photocells' power lead. I connected the motors' ground leads to each other and then to ground on the mega. Then I plugged each signal lead into a PWM output on the mega. At this point the pot was a veritable rat's nest of wires. I taped a piece wire to each motor (to simulate the branches) and tested them, and to my relief, everything worked.


Then I began securing the branches to the motors, which was easily the most frustrating part of the process. I sanded the motor arms and the branch wires to roughen up the surfaces, then applied liquid cement. I clamped each branch with two binder clips, and used parchment paper to keep the cement from getting on other things. This was waaaayyy more difficult than it sounds, due to how crowded the pot was.


After letting the cement cure for several hours, I removed the clamps and wrapped them with gorilla tape. Then I plugged it in, and it didn't fall apart! :D I cannot emphasize enough how relieved I was, as I'd had to redo the cement and clamping on several branches and it was incredibly frustrating.


Then I spent a few hours adjusting the code to try to get the effect I wanted. I finally went home at 3am.


The final touch was to cover the top of the pot with some black fabric, to hide all the hardware and wires. I don't have a photo because my camera battery died.

Also, I neglected to mention in my last post that the copper leaves were patina'd by spraying them with salt water and tenting them with a dish of ammonia. Sadly, the heat of soldering them turned the patina to powder, much of which was accidentally brushed off before I noticed. By the time I sealed them with a coat of clear gloss spray paint, the effect was greatly diminished. I still think they look nice, though.

Wednesday, December 7, 2011

Putting Everything Together

So now that I got the mechanics of project working, I needed to work on the concept part. It has been very frustrating for me, I feel like my lack of experience with electronics makes simple obstacles a lot more difficult for me than someone else. Working on the song part of this was a nice break- At least I know how to do that. I've written songs before, and I usually can crank them out a a few hours. I knew that I really wanted to work with either the Mona Lisa for this project, for a while I was considering a self portrait of Van Gogh, in the end I stuck with Mona Lisa, I liked the iconic quality that she had, and also felt that I really wanted to sing from the perspective of the painting, being a female I thought my voice would mesh better with a female subject.

I approached what I wanted to say from the perspective of the painting, not just the subject in the painting in their own life, but the subject AS a painting that has been on the wall for 500 years, and what it must be like to go through so much. Sort of like the saying, "if walls could talk"...

I used my knowledge of the piece to reference historical bit of information, but all in all, this is not necessarily a history lesson. I really wanted to think about the Mona Lisa in terms of using art history to create a persona and a story for her. I though of her as a "Diva" , her image is plastered everywhere, possibly the most famous, talked about, referenced, and visited piece of art. How could she not be a Diva. Plus, she is an old piece, over 500 years- so there's that. I imagined she would be a bit peeved about her aging situation and such.

I wanted to create a song that was really electronic pop sounding- something catchy and upbeat. I wanted her sound to stand out against her age, and image as this classic work. Perhaps, someone at the time she was painted would have composed a classical song for her- but this is 2011 so that was important to me NOT match the sound with her image. Even with the way she speaks.

I had been developing lyrics over the course of the past weeks, but I wrote the music in just a few hours. Originally, I had sung most of the song- however I ran into some audio amplification issues. The sound from the speaker that came with the kit just wasn't loud enough and I was worried that people would not be able to hear the lyrics as well is I were signing them- so I changed the song to more of a rap. I figured what she has to say in the lyrics is more important than my vocal ability, and I'm happy with the last minute decision I made. I think it gives her character a bit more attitude. The original song can be heard in the video below when I tested it at home.


The Perfect Frame!


Attaching my components to the frame


Mona up on the wall


Relatively Immediate Reflections on Critique, etc.

image as it appears on wall
image with RFID key- the indented text appears when the button on the reading device is pressed, go to this link to zoom because blogger is stupid.

comments made:
What was my exact exact purpose in making this? I just thought it was interesting, I thought it could generate some interesting thoughts in individuals who like chemicals like me, and maybe everyone else would just enjoy the photo, or playing with the device.
Consider using a map instead of a photo [also in this was the criticism that some of the dots were in weird, logical-seeming places, like on people or in the air, and that it was confusing if this meant anything]: NOOO, A. It would take me monthsandmonthsandmonths get that much data, it's difficult, B. You could interpret the crowds of the city as being global and mixed already, C. The lines of the diagram aren't noticeable from a distance and I like it that way, that the work functions as a basic photocollage before an interactive piece. More thinking about dot position below the below:
The LOVE was not seen as the focal point: Fair enough, I bumped it up a bit but it's not enough, but I don't want to compromise the length of the piece, it makes you think about crowds and moving and that parallels the sort-of secret subject of the work, the materials of the aluminium smelting process.
Think about emphasizing the lines: I'll think about it, but I like the hidden information system, just as information about smelting is not immediately obvious, but you have to make some effort to learn about it. SEE, I THINK ABOUT THESE THINGS.
Make a system about your materials: Good point. Things are loosely organized, like, I generally put gaseous Things above solid Things, but without a consistent system. Even if no one figures out the future version, which would have such a system based on state [because it makes more sense than atomic mass or density], it would result in a more regular, pleasing appearence [even though it's difficult to see now].
Make the length of lines mean something: Also a good point and a good headache- they could address amounts of materials, amounts of time materials spend doing what they do, distance they travel from their source of production [SUPER-HARD], or something else I can't think of.


comments not made:
You thing doesn't actually work. Discuss: OMG, I know, it was so tragic. It was working perfectly until I decided, Okay, let's make it pretty and put it in a box! And then I had to move some wires and do some sautering and it just died, and hours later I figured out the screen wasn't always initializing and that I had to press the reset button a lot, and then some time later half the screen of that one went black and wouldn't change, even when there wasn't any code, and the button wasn't working when I took it off the breadboard and sautered wires to it and you know what, whatever, it wasn't that great of a box anyways and when I taped my mishmash two breadboard-Arduino-battery pack monster together at the end it was pleasingly hand-friendly, with my left thumb conveniently over the ever-necessary reset button, right hand free to gesture and occasionally press the button to show the second screen. I really just don't know what went wrong; even when I went back to my original setup, a new GLCD, original stunningly functional code, checked all of those wires I don't know how many times, power supply, resistors, potentiometer, I even at one point put everything on a different Mega, it would just quit after varying amounts of time, when before it had not been an issue, it would read and RFID, print, the button would work and you could leave an RFID on it for half an hour and it would be fine [I know because I accidentally did that], I don't know, and it's disappointing because it would have been so much more awesome if I wasn't afraid of someone else dropping little Frankenstein, people could have had short interactions, followed the production paths they wanted to, alas.


Some last in-progress images:
I think I broke this GLCD :/


an example of the GLCD quitting, later figured out one I broke, the other wasn't getting a good enough of a connection :( you can see I'm getting a little frustrated
the tragic box that started everything crashing- it had a button, a hole for the power switch, and I cut out part of the side to fit the screen in. I tested the RFID and it worked fine through the plastic, which makes sense, just as soon as I started to move things: [insert the sound of failure]


Later edit:
I felt reeeeally stupid when I figured out that holding the screen at an angle to the breadboard gave it better connections and resulted in it blanking out far, far, far less, to the extent that I wasn't afraid anymore of no one but me touching it, ergo:

Further comments made:
It's more informational than art: I agree, I had issues and my translation of the thing is that it's more "artistic" than art. I would need a more clear idea of what I want people to think, trying to actively shape their opinions, to bring it closer to art; originally I'd intended for interpretations to be more open, but unless it happened to look like this and was placed in an art gallery, this could easily belong, in a more polished state, as a purely educational display.

Suggestions: The above, have a really clear idea of what I want to say. Keep info on how the materials are used in the process, alter the information on that second screen. I thought about maybe talking only about where the materials come from [seawater, mining, other materials [and then where those materials are from] and their final state [dumps, emissions, used to make asphalt, whatever]; I though about having multiple buttons and screens being able to display first general info, then from where the material comes from, then how it affects humans and environment; it was suggested incorporate video or image somehow, so I thought about using a different screen and making it display a series of simple images to generate "video," or using multiple screens, or having just lines on the wall and a video display on a screen on the wall, or it was suggested a projection, playing relevant information, or video pertaining to information that would be on a handheld screen, some combo of everything plus Wii plus food art plus music plus pumpkin carving, anything.

Summary: Interesting effort, we'll distil it down into "Possibility."

process work triumphs and failure

Below is process photos from my light crown. Which started off cleanly and simply as I had planned it. Everything was going perfect! The lights worked, and all I to do was perfect the code. When I brought them home, they must've gotten jostled, so only 2 of the worked solidly, the rest would only flash if I jostled around the crown. I got frustrated and perfected the code- which didn't work the way I wanted as you can see in my previous post, even though its completely valid if/else statement. THEN my computer started to lock up and make a computer 'beep' noise every time I tried to type on the keyboard, bc the arduino had been plugged in for a coupe hours now? I don't know. For a while, NONE of the lights worked, and now its just one. The piezo disks have been breaking off at alarming rates and I've been soldering them back on, but its not working at all. 

The photographs of my face you see are my display methods. My performance would include my audience coming into the black box, which would be extremely dark, with my crown as their "eyes" or only source of light in the room. I would offer participants food roughly resembling eyeballs (I have time for raspberries) and Once the participant ate one, they would flick off one of my lights- essentially eating my eye and throwing the room into darkness or "blindness."

St. Lucia had her eye gouged out and thats why she's the saint of light, because she was blind. I confuses me why this is glossed over in the celebration, which uses the oldest girls to wear candle crowns and offer people sweet snacks. It's a little twisted, so in my performance I wanted to include the process of communal eating, but in a way I think is more pertain able to the holiday.    

Video of code