Showing posts with label Tatyana Mann. Show all posts

Thursday, December 17, 2015

Final video documentation


Suggestions from critique:
  • to paint the frame white not black since it is in a mostly white space. 
  • To have more tubing.
  • Refine the code better to react to people distances 
  • make a less bulky frame. Possibly hang from ceiling if allowed in a different location
  • If this project was continued, it was suggested that we use LED strips instead of the tubes.

Improvements we would have like to have:
  • Make a less bulky frame
  • have frame blend with the enviorment more
  • have the tubes straight instead of curled so they do not hang to each other
  • make the hanging tube more dense
  • Have more motors
Overall, I feel this project was successful. We aimed high and shot a little low, but I believe our concept came across. Other students walking in and out of the library asked multiple times if they could walk through it and were excited when we said yes. That kind of recognition and interaction is what we wanted. Like we explained at the beginning of the semester and during crit, this piece was heavily influenced by Soto's Penetrable. We wanted to provide the same art and observer interaction as Soto does with his piece while giving the artwork itself a response to the observer and in a way, giving it a sense of life.


Wednesday, December 16, 2015

process work

So last night, we ran into a big problem with our project. It worked how we wanted it to Sunday night, but while doing some little last minuet touch ups to the installation and a final run through test, the code would not up load to the boards. It's really bizarre. We even tried uploading the basic Blink code and it would not work. It kept giving us this same error code:
I googled this error code and everything I found suggested reseting the bootloader and reseting the driver. I tried following tutorials on how to do this, but it is pretty far out of our knowledge and skill base.

We changed every variable we could thing of. We changed usb cables, uploaded from different computers, used a PC instead of our macs, used fresh new arduino boards, and used different codes with the new boards. But I think we have determined it is our code. We figured this out by taking Ivette's arduino board and uploading the simple Blink code to it, and then trying to upload our code and we got this same error code. We have no idea how our code could have gotten corrupted with in the past 24 hours since this is the same code we have been using for weeks. We have looked over our code and retyped it into a fresh sketch window and tried uploading it and it still produces this error. Right now we are trying to update the arduino program, type up the code in a new sketch window, and upload it to a fresh board. We shall see if this works.

UPDATE:  It worked. We had to update the Arduino program on our laptops to the latest version which was just added on the 15th. (What a coincidence.) So we updated it on both of our laptops, and had to retype the code into a new window and resave it and THEN we could upload it to the arduino board. And we also had to use brand new fresh boards. I think the boards that had our old code without the update were corrupted by the code somehow.

Here is a video explaining our project a little more with both sensors and all motors working.


Final Project- The Last Time

Hello reader, 

My name is Tatyana. And I am Kelsey. And we are here to talk to you about our Final Sensors Project. 

At the beginning we were hopeful. Happy even. We had an idea early on, one with both an aesthetic appeal and concept to back it up. Our progress was slow, but quite steady. Week after week, we learned something new, and something difficult; yet we persevered. You can't fathom our joy, nay elation when a code worked, or a motor ran, or a daisy chain was successfully soldered. Or the satisfaction felt when our platform was made, our wood painted, and our permeable assembled. 

AND THEN TO HAVE EVERYTHING COME TOGETHER AND WORK
no words.


So, by now you may be able to understand how confident we were the day before critique: we merely went down to our project, fine tuned some last minute touches, and then turned on its glory.

To find it not to work. 

It doesn't work. AT ALL.

The usb cable, or the Arduino or the serial port are all working together– to not work. 

And we are at a loss for words.
And while we did have a pity party (lasting an hour or so, with only our closest friends), we realized something this morning. Perhaps it's due to the much needed hours of sleep we actually got last night, or the fact that today is the last day of finals, but we realized, that while our project may have failed LITERALLY THE LAST DAY BEFORE WE NEEDED IT, we did in fact still learn something. Actually we learned a lot. We've overcome soo many obstacles (sleep), and thought a lot bigger than we ever thought we could for a sensors class. In all honesty, isn't that the point?

It doesn't work. Yes. But we are ok with that. In fact, we're quite proud.

Thank you for the semester. Happy Holidays.
-K&T.


Tuesday, December 15, 2015

Process work

Did not work :(  even when plugging the 9 volt to it. We even checked it with a multi meter and it was giving 4 volts which we concluded should be enough for each motor. This circuit only has two motors soldered to it in to save ourselves a little stress and time. The circuit is soldered to hold 12 motors in total

But we took it to a different outlet to see if that was the issue. But I burnt my finger on the board instead.


Saturday, December 12, 2015

Process Work 12/12

Consistency is the major problem for this project: regardless of the power source, the motors will run, stop running, and then constantly run regardless of the IR sensor.


Process Work 12/12

I came into the studio early today to look at the circuit again. I connected a multimeter to it and the motors worked perfectly with the sensor just like they did the first time, but only when the multimeter was connected. I tried to get a video of it working but then it stopped just like it stopped working with our laptops. I changed the Hbridge out as well and it still wouldnt power. You can hear the motors try to turn but they dont actually power up. I know its taking too much power and I do not know of any other power source we can use. We may have to drop it down to only four motors if they are really drawing that much power.

Friday, December 11, 2015

12/11 Process Work!!!

Videos below on the soldering process and after product photos


Process work Final

Last week we got our frame built. Here are pictures of the process going from my house to the studio.
corgi for scale


 motors being positioned and installed

 one of our biggest problems right now is power supply, so we decided to go with only 12 motors to make configuring the power easier.

 installed in hallway. The peg board will be placed on top of the opened frame when all of the motors and tubes are installed.
 nice and sturdy :D


12/07 Process Work


WENT TO LOWE'S TO GET SUPPLIES:

- wood
- peg board
- tubing 
- fun

process work final project 12/11

We are trying to figure out power supply right now. We had our motors working perfectly but then it shut down my laptop multiple times and now we cannot get them to run from any power source.

For 5v power supply, motors consuming .16 amps, so if we have 12 motors consuming .16 amps each, then we are going to need 2 amps minimum to power the motors.
For 9v it would be 4 amps consumed total.
For 12v it would be 5 amps consumed total.

Monday, December 7, 2015

Final project process work 12/7

Doesn't look like a whole lot right now, but we got the H-bridge working with four DC motors and we got the parameters of our sensor how we want it and the go the three different speed of our motors that we want. All there is left to do now it piece it together and apply it to the interface. 

Wednesday, December 2, 2015

Alternative to Skycraft Scavenger Hunt

Alternative to Skycraft Scavenger Hunt                         20 points

Please go on the internet and find the following products. Please provide me with a URL Have fun shopping!

Please locate 4 different kinds of LEDs. Look up the voltage and amp specs for each. 2 points

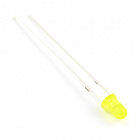
    • LED Basic Yellow - 3mm
      • 2.0-2.4VDC forward drop
      • Max current: 20mA
      • Suggested using current: 16-18mA
      • Luminous Intensity: 40-100mcd
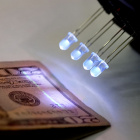
    • LED Ultraviolet - 5mm
      • 395-400nm
      • 100-180mcd
      • 3-3.6V forward drop
      • ~12mA
    • Diffused LED - RGB 10mm 
      • Forward Voltage (R/G/B): 2.0 / 3.2 / 3.1V
      • Forward Current: 20mA
      • Intensity (R/G/B): 550 / 250 / 700 mcd
      • Common Cathode
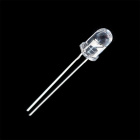
    • LED Infrared 950nm
      • 940-950nm
      • 1.5VDC forward voltage 
      • 50mA max forward current

LED - Basic Yellow 3mm LED - UltravioletDiffused LED - RGB 10mmLED - Infrared 950nm

Find two devices that contain solar panels and tell me what they are. 1 point
    • Solar Cellphone Charger
      • use solar panels to charge cell phone batteries
    • Strawberry Tree
      • world's first public solar charger and wifi station
      • solar panels that transform solar energy to electrical
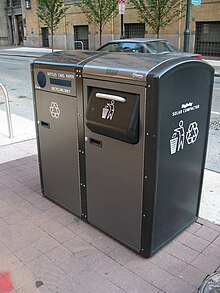
    • BigBelly
      • solar powered trash compactor
      • mechanism is chain-driven; runs on a 12V battery, kept charged by solar panels


Find a breadboard. .5 point

  • https://www.sparkfun.com/search/results?term=breadboard


Breadboard - Self-Adhesive (White)

Go to Makers Shed or American Scientific and find 5 devices that contain sensors and tell me what they do. 2.5 for devices and .5 what they do 3 for total of 3 points

  • LightBlue Bean Bluetooth LE Device
    • microcontroller that is programmed wirelessly over Bluetooth Low Energy
    • ideal for use as a long-term sensor or data logger.
    • 8 digital I/O pins
    • RGB LED
    • 3-axis accelerometer
  • MaKey MaKey Standard Kit
    • turn nearly anything into a controller or computer key
    • The MaKey MaKey uses high resistance switching to detect connections. This means that it will detect a "button press" even if the material is only somewhat conductive
    • The front of the device has six inputs arranged like a classic video game controller.
  • BLINK1 MK2 | Maker Shed
    • hook USB RGB LED to your device to alert you for meetings or when you get a new email
    • pulse when someone mentions you on Twitter
    • glow red if your computer’s CPU is slammed
    • flash when a web page has changed
    • packs three dimensions of information (color, brightness and pattern)
  • Brainwave Mobile Starter Set (iOS, Android)
    • Control programs and projects with your mind
    • MindWave Mobile headset transfers data via Bluetoothï¾™ to wirelessly communicate with your computer and mobile devices
    • safely measures and outputs the EEG power spectrums (alpha waves, beta waves, etc), NeuroSky eSense meters (attention and meditation) and eye blinks.
    • The Mindwave device consists of a headset, an ear-clip, and a sensor arm.
    • The headset's reference and ground electrodes are on the ear clip and the EEG electrode is on sensor arm, resting on the forehead above the eye 
    • Use single AAA battery
  • Brother Buster Alarm Kit (a sophisticated version of mine)
    • create an alarm that will go off when your siblings trespass
LightBlue Bean Bluetooth LE Device MaKey MaKey Standard KitMaKey MaKey Standard KitBlink(1) mk2
Brainwave Mobile Starter Set (iOS, Android)


Brother Buster Alarm Kit
Find 6 different kinds of cables and give me specs of each size in gauge. Also look up what each kind. 3 point total


  • Banana to Banana Cables
    • various leaded cables for attaching to multimeters, power supplies, oscilloscopes, function generators, etc. Cables come in red/black pairs.
    • 36" Long
  • Jumper Wire - 0.1", 5-pin, 6"
    • simple five wire cable
    • Great for jumping from board to board
    •  5-pin JST RE connector on both ends
    • simple jumper wires used on standard 0.1" breakaway headers
    • 6" length
  • Banana to Alligator Cable
    • 36" long
    • arious leaded cables for attaching to multimeters, power supplies, oscilloscopes, function generators
  • OBD-II to DB9 Cable
    • allows you to access the pins on your car’s OBDII connector
    • has an OBDII connector on one end and a DB9 female serial connector on the other
    • 5' long
    • not meant to be plugged directly into a computer’s serial port

    • Here is the basic pinout (OBDII > DB9 Female)
      Pin DescriptionOBDIIDB9
      J1850 BUS+27
      Chassis Ground42
      Signal Ground51
      CAN High J-228463
      ISO 9141-2 K Line74
      J1850 BUS-106
      CAN Low J-2284145
      ISO 9141-2 L Line158
      Battery Power169
  • USB Cable A to A - 6 Foot
    • A to A Male/Male USB cables
    • will work with any other USB device that has a USB female A type connector
    • 6'
Locate a really cool electronics kit that measures something. What does it do?  .5 points


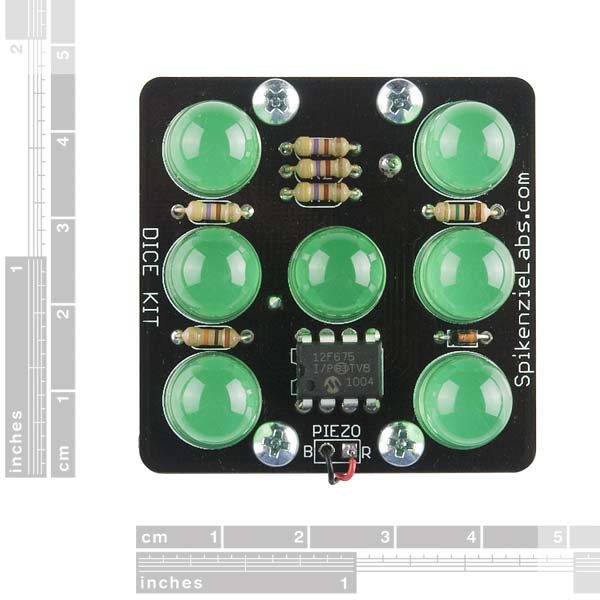
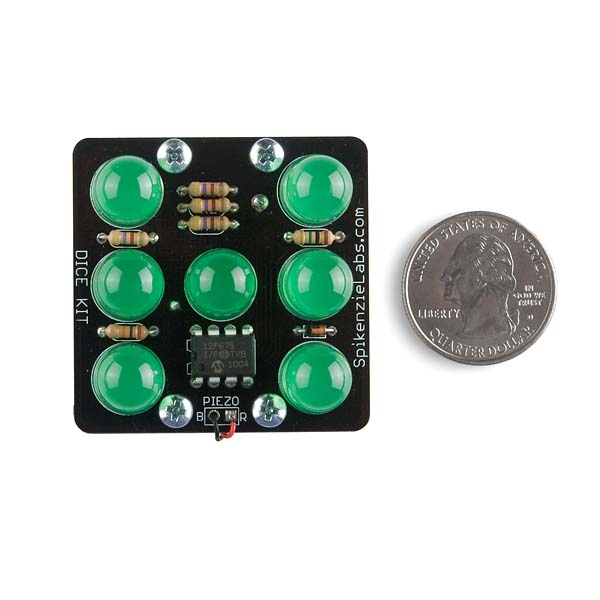
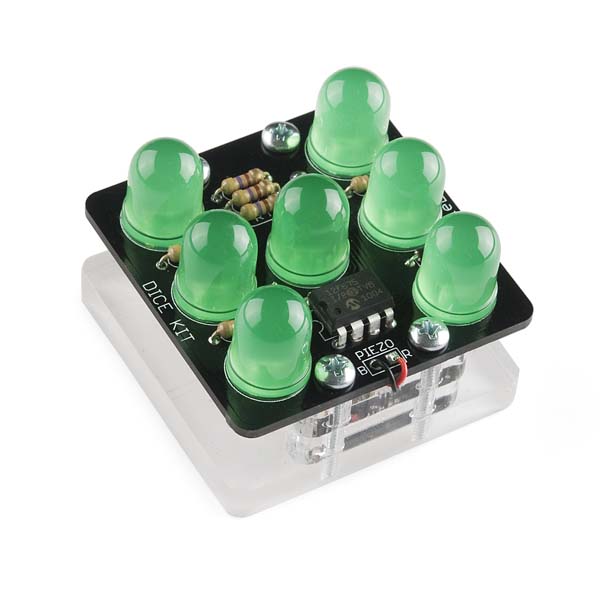
  • Electronic Dice Kit
    • The Dice Kit is a beginner’s soldering kit that comes with everything you need to make your own electronic die. When you tap it on the table, it displays a number from 1 to 6 by lighting up the appropriate number of LEDs in the same layout as found on traditional non-electric dice.
    • The kit uses a piezo element for detecting the tap on the table and uses a pre-programmed micro controller. It also includes a laser cut acrylic base and battery. There’s no programming required and a beginner can get the kit together in about an hour or so. You will need a soldering iron and basic tools. Also, a dab of glue or double-sided tape is recommended as well.
    • Features:
      • Auto power saving sleep mode after ~15 seconds of inactivity.
      • Laser cut ¼" acrylic base
      • Includes CR2032 battery
      • Stand alone kit
      • No computer needed
      • No Arduino needed
      • Easy to build
Electronic Dice KitElectronic Dice KitElectronic Dice Kit
Find 5 different motors and describe each look up what they might be used for. Please tell me if they are DC motors, servo motors, AC/DC motors or stepper motors. 3 including descriptions

  • Dual Motor GearBox
    • excellent way to get started quickly with robotics
    • ability to be controlled by low-cost motor driver ICs
    • Motors operate from 1.5-3V
    • controlled by L293DNE, SN754410, and other low-cost motor drivers

    • Stepper Motor - 29 oz.in (200 steps/rev, Threaded Shaft)
      • STEPPER
      • steppers have a threaded shaft, which allows them to be used as a linear actuator
      • moves along the shaft at a specific rate of 1cm per 5 full rotations
      • good choice for linear motion
      • Rated Voltage: 12V
      • Rated Current: 0.4A/Phase
      • Stepper Motor - 125 oz.in (200 steps/rev)
        • STEPPER
        •  Unipolar stepper, meaning that if you are going to drive it with a bipolar stepper driver, you can ignore the yellow and white leads and drive it using the remaining four
        • Rated Voltage: 3V; 
        • Rated Current: 2A/Phase
      • Hobby Motor - Gear
        • a 6mm, 10 tooth gear 
        • normal operating voltage range of 1.0 to 3.0VDC
        • DC 
      •  Vibration Motor
        • shaftless vibratory motor is perfect for non-audible indicators
        • indicate to the wearer when a status has changed
        • 2-3.6V operating range

      Find 3 types of camera or optical devices. 1.5 points

      • Raspberry Pi Camera Module - Pi NoIR
        •  5mp IR (Infrared) camera module is capable of 1080p video and still images
        • connects directly to your Raspberry Pi
        • 25mm x 20mm x 9mm
        • weighing a little over 3 grams
        •  sensor has a native resolution of 5 megapixels with a fixed focus lens on board
        • apable of 2592 x 1944 pixel static images and also supports 1080p30, 720p60 and 640x480p60/90 video
      • Webcam - USB
        • simple USB Webcam
        • resolution is 1024x768 which is adequate for motion-tracking or object-detection
        • 3' (914.4mm) Retractable USB-A Cable
      • CMOS Camera Module - 728x488
        • high-quality color CMOS camera module
        • Power the CM-32 module
        • hook up any display, monitor, or LCD screen with an RCA input and get vivid color video
        • 728x488 resolution
        •  wide operating voltage (6V to 20V)
        • 50mA (at 12V)
      Find three devices that deliberately (sound production is part of their function) produce sound and tell me what they are. 1.5

      • Piezo Speaker - PC Mount 12mm 2.048kHz
        • small 12mm round speaker that operates around the audible 2kHz range. 
        •  create simple music or user interfaces.
        • PTH solderable 
        • requires an operating voltage of 3.5-5V  
        • mean current of 35mA max 
        • typical sound output of 95 dBA 
        • coil resistance of 42 ±6.3 ohms.
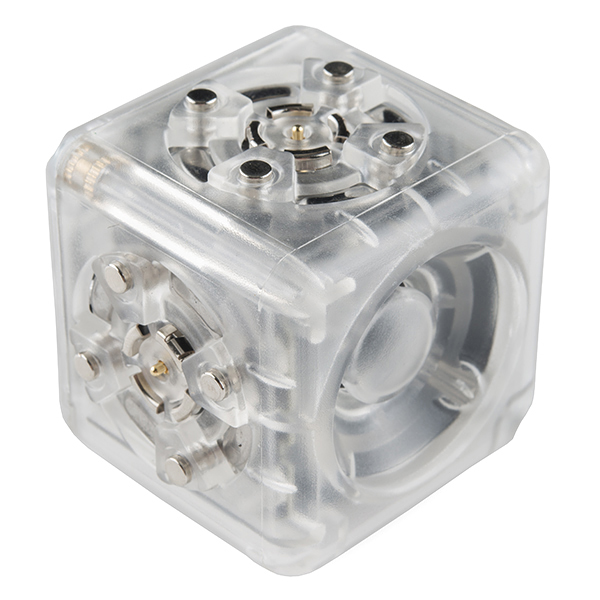
      • Cubelets - Speaker Cubelet
        • contains a small speaker and an amplifier that will chirp according to the block’s data value
        • magnetic blocks that can be snapped together to make an endless variety of robots
        • require a special battery and charger
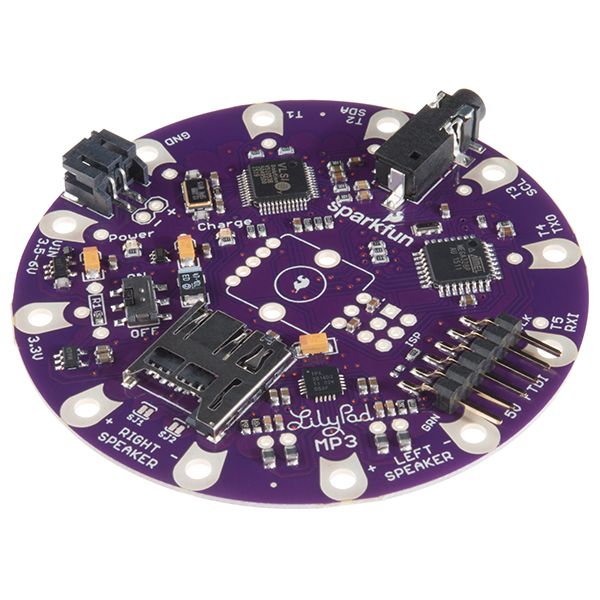
      • LilyPad MP3
        • all-in-one audio solution
        • containing an Arduino-compatible microcontroller
        • MP3 (and many other formats) audio decoder chip
        • micro-SD card socket
        • a stereo audio amplifier
        • powered by a 3.7V Lipo battery or an external 3.5-6V source
        • compatible with sketches written for the MP3 Player Shield


      Piezo Speaker - PC Mount 12mm 2.048kHzCubelets - Speaker CubeletLilyPad MP3

      Find five different kinds of potentiometers or variable resistors. What is their range of voltages? What are they used for? 3


      • Rotary Potentiometer - 10k Ohm, Linear
        • adjustable potentiometer
        • turn the pot and the resistance changes
        • connect VCC to an outer pin, GND to the other, and the center pin will have a voltage that varies from 0 to VCC depending on the rotation of the pot
        • hook the center pin to an ADC on a microcontroller and get a variable input from the user
        • has a ¼" mounting diameter and has a 10K linear taper
      • SoftPot Membrane Potentiometer - 50mm
        • very thin variable potentiometers
        • pressing down on various parts of the strip, the resistance linearly changes from 100Ohms to 10,000 Ohms
        • used as an accurate positional indicator for CNC head positioning
        • variable user input (volume level input)
        • straight user input
        • connector is 0.1" spaced
        •  does not fit nicely into standard female headers because the pins are too small
        • work great with a finger, or stylu
      • Thumbwheel Potentiometer - 10k Ohm, Linear
        • when you don’t have space on your enclosure for a knob and you still need access to a tuning or volume control
        • 10k ohm linear potentiometers 
        • will mount into standard 0.1" pitch proto-boards
      • Slide Potentiometer Knob
        • knob that connects to the linear slide potentiometer
        • High Visibility Color Slide
        • Knob has a nice friction fit onto slide
      • SparkFun Touch Potentiometer
        • or Touch Pot
        • linear capacitive touch sensor 
        • implements potentiometer functionality with 256 positions
        • operate as a peripheral to a computer or embedded micro-controller/ in a stand-alone capacity
        • provides both a dual-channel analog and PWM output for direct control of other circuitry
        • controlled by a Microchip PIC16F1829 8-bit micro-controller
          •  provides the host interface, LED control, capacitive sense and peripheral control functions
        • built-in low-dropout voltage regulator allows operation over a range of input voltages up to 12V

      Find three different kinds of project boxes to house an electronics project. 1.5 points

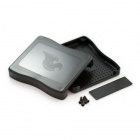
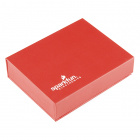
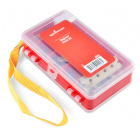
      SparkFun Project Case - BlackSparkFun Parts Box - Small (magnetic)SparkFun Beginner Parts Kit


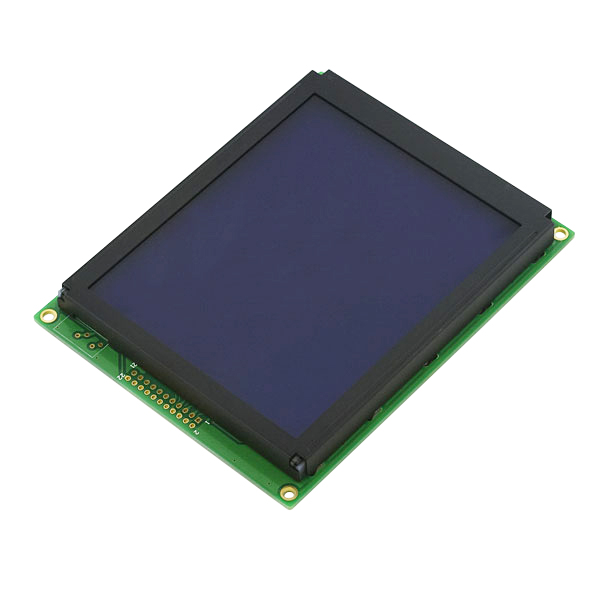
      Find an LCD panel. .5 points

      Graphic LCD 160x128 Huge
      I want to build a special holiday hat that lights up when I tilt my head side, plays music when I tilt my head backwards and shoots off my head when I tilt my head forward. Please make a list of the supplies with URLS that I will need to build this hat. (3 points)

      Das Blinken Top Hat 

      based of the hat from the link above, you could follow along to get a similar hat you desire. The list of supplies are as follows:


      Total Point