Showing posts with label Julia Simeone. Show all posts

Wednesday, December 12, 2012

Final Process and Post-Crit Reflection

Here is my final code for my project:


// Project 38
#define sensorPin 9
int ledPin1 = 1;
int ledPin2 = 2;
int ledPin3 = 3;
int ledPin4 = 4;
int ledPin5 = 5;
int ledPin6 = 6;
int ledPin7 = 7;
int ledPin8 = 8;
int ledPin10 = 10;
int ledPin11 = 11;
int ledPin12 = 12;
int ledPin13 = 13;
//float ledValue = 255; // The brightness of the LED
long pwmRange, inch;
void setup() {
  // Start serial communications
  Serial.begin(9600);
  pinMode(sensorPin, INPUT);
  pinMode(ledPin1, OUTPUT); // Set the ledPin to an OUTPUT
  pinMode(ledPin2, OUTPUT);
  pinMode(ledPin3, OUTPUT);
  pinMode(ledPin4, OUTPUT);
  pinMode(ledPin5, OUTPUT);
  pinMode(ledPin6, OUTPUT);
  pinMode(ledPin7, OUTPUT);
  pinMode(ledPin8, OUTPUT);
  pinMode(ledPin10, OUTPUT);
  pinMode(ledPin11, OUTPUT);
  pinMode(ledPin12, OUTPUT);
  pinMode(ledPin13, OUTPUT);


  // Flash the LED twice to show the program has started
  digitalWrite(ledPin1, HIGH);
  delay(150);
  digitalWrite(ledPin1, LOW);
  delay(150);
  digitalWrite(ledPin2, HIGH);
  delay(150);
  digitalWrite(ledPin2, LOW);
  delay(150);
  digitalWrite(ledPin3, HIGH);
  delay(150);
  digitalWrite(ledPin3, LOW);
  delay(150);
   digitalWrite(ledPin4, HIGH);
  delay(150);
  digitalWrite(ledPin4, LOW);
  delay(150);
  digitalWrite(ledPin5, HIGH);
  delay(150);
  digitalWrite(ledPin5, LOW);
  delay(150);
  digitalWrite(ledPin6, HIGH);
  delay(150);
  digitalWrite(ledPin6, LOW);
  delay(150);
  digitalWrite(ledPin7, HIGH);
  delay(150);
  digitalWrite(ledPin7, LOW);
  delay(150);
  digitalWrite(ledPin8, HIGH);
  delay(150);
  digitalWrite(ledPin8, LOW);
  delay(150);
  digitalWrite(ledPin10, HIGH);
  delay(150);
  digitalWrite(ledPin10, LOW);
  delay(150);
   digitalWrite(ledPin11, HIGH);
  delay(150);
  digitalWrite(ledPin11, LOW);
  delay(150);
  digitalWrite(ledPin12, HIGH);
  delay(150);
  digitalWrite(ledPin12, LOW);
  delay(150);
  digitalWrite(ledPin13, HIGH);
  delay(150);
  digitalWrite(ledPin13, LOW);
  delay(150);
 /* digitalWrite(ledPin11, HIGH);
  delay(150);
  digitalWrite(ledPin11, LOW);
  delay(150);
  digitalWrite(ledPin12, HIGH);
  delay(150);
  digitalWrite(ledPin12, LOW);
  delay(150);
  digitalWrite(ledPin12, HIGH);
  delay(150);
  digitalWrite(ledPin12, LOW);
  delay(150);
  */


}
void loop() {


  //analogWrite(ledPin, int(ledValue) ); // Write brightness value to LED
  pwmRange = pulseIn(sensorPin, HIGH);

  // 147uS per inch according to datasheet
  inch = pwmRange / 147;

  Serial.println(pwmRange);
  delay(175);

  // if (ledValue <= 0) {
  //   ledValue = 0;
//}  // Make sure value does not go below zero
//  ledValue = ((5*(inch))-25);
//}

if ((pwmRange <= 2019) && (pwmRange >= 288)) {
digitalWrite(ledPin1, HIGH );
}

else if ((pwmRange <= 3217) && (pwmRange >= 2020)) {
digitalWrite(ledPin2, HIGH );
}

else if ((pwmRange <= 4415) && (pwmRange >= 3218)) {
digitalWrite(ledPin3, HIGH );
}
else if ((pwmRange <= 5613) && (pwmRange >= 4416)) {
digitalWrite(ledPin4, HIGH );
}

else if ((pwmRange <= 6811) && (pwmRange >= 5614)) {
digitalWrite(ledPin5, HIGH );
}
else if ((pwmRange <= 8009) && (pwmRange >= 6812)) {
digitalWrite(ledPin6, HIGH );
}

else if ((pwmRange <= 9207) && (pwmRange >= 8010)) {
digitalWrite(ledPin7, HIGH );
}
else if ((pwmRange <= 10405) && (pwmRange >= 9208)) {
digitalWrite(ledPin8, HIGH );
}

else if ((pwmRange <= 11603) && (pwmRange >= 10406)) {
digitalWrite(ledPin10, HIGH );
}
else if ((pwmRange <= 12801) && (pwmRange >= 11604)) {
digitalWrite(ledPin11, HIGH );
}
else if ((pwmRange <= 13999) && (pwmRange >= 12802)) {
digitalWrite(ledPin12, HIGH );
}

else if ((pwmRange <= 15198) && (pwmRange >= 14000)) {
digitalWrite(ledPin13, HIGH );
}

else {
digitalWrite(ledPin1, LOW);
digitalWrite(ledPin2, LOW);
digitalWrite(ledPin3, LOW);
digitalWrite(ledPin4, LOW);
digitalWrite(ledPin5, LOW);
digitalWrite(ledPin6, LOW);
digitalWrite(ledPin7, LOW);
digitalWrite(ledPin8, LOW);
digitalWrite(ledPin10, LOW);
digitalWrite(ledPin11, LOW);
digitalWrite(ledPin12, LOW);
digitalWrite(ledPin13, LOW);
}
}

Here is process of my project working during Critique in the dark. My model for this project is Jason. While he was wearing the brain, he had a sensory deprivation experience, which I thought was interesting.

Here is the video:
ps. the light is not the best, but you can kind of see the form of Jason with the brain on his head and the lights working.


Reflection: I had a lot of fun with this piece, despite the minor setbacks. The first issue that I had was not receiving the microphone that would work with my project until the day of critique itself (go figure). But I worked through that and created another analogy for the idea of connections and being close to another person to gain understanding. Also, it was brought to my attention that I needed more LEDs and in other areas of the brain, which I agree with. In a possible addition to this piece, I could use an arduino mega so that I could have more pins to put LEDs in. One of the critiques that I found most interesting is the idea of sensory deprivation in many categories. I might like to explore this a little bit more. One thing I thought would be really interesting is when someone mentioned making a brain that restricts your sight and then creating a room where they could not be hurt and all they could do is hear and touch. Another interesting deprivation room would be to only allow seeing within the space. I agree that the lights needed to be placed in different areas of the brain and had forgotten or gotten stuck on the idea of the body being cognizant of speech rather than touch and distance. Ultimately, I would like to expand on this project, possibly in my last semester as installation or advanced experiments.

Sunday, December 9, 2012

IT'S ALIVE... finally my brain is working.. *take that literally or figuratively as you wish* :)

I got my LEDs to work and transferred them to my brain. Now my brain works and I have the whole setup run off a 9 volt battery. The case that the project is in is a small Walmart backpack. Here is video for proof before crit that it is working. Let's hope it will do the same tomorrow! :D So very happy.


I am very pleased with how it turned out. The rangefinder is kind of finicky at times, but it works and I'm proud of my progress despite my various setbacks.

Friday, December 7, 2012

Major Progress and Finalizing to my Brain Project

I have made SIGNIFICANT progress on my project..

Since the "Arduino sound detection module" has yet to come in yet, I have resorted to changing up my concept a little bit. Instead, I will be using a rangefinder for my sensor and creating an analogy with, again about communication. The analogy will be that as a person gets closer to you and interacts with you, you get a better understanding of who they are, and the light allows you to see them as a visual way of processing. The closer the person is to the rangefinder, the more lights that will light up and the more you can see in the room. It's not as clear as I had made the communication with the speech analogy, but I still think it connects to my theme of connection overall.

Here are some of my videos of my progress:

This is the first test on my single large diffused red 10mm LED:


This is my test with the shift registers that did not end up being needed, but I put it on here for process anyways:


Here is the original code that I got from Nisa working with the rangefinder the LED she used. In this test, as you get closer to the rangefinder, it dims until it goes out. As you move away, the light is the brightest. Here it is:


Then we modified this project to work with 3 LEDs. We also sectioned out the distances into three categories of different ranges. Each LED would light up when an object came into it's range and it would eventually be a cumulative bright spectrum when you came closest to the rangefinder (or what will be the brain. Here is the video for that:


Since this  was successful, I replicated the process and assigned 12 different LEDs to each pin and changed them to be more sensitive to range according to how far or close you are. This was successful as well, although slightly buggy when it gets to a further range, but I'm happy with the product. Here it is:


These are a few close ups of the 12 LED rangefinder unity I will be using:


These are a few sketches that I want to show you as to how this will work in the critique sense: Also, there are some good sites about language and other things that I had originally planned on having before the project turned in the direction of closeness.


This is the side view where the LEDs will be placed. They will still be connected with the parietal lobe,  to represent an understanding of the person's connection. As the person comes closer, the Rangefinder in the front will sense this and the LEDs will cumulatively light up based on distance.


This is the front view where the black dot is going to represent the position of the rangefinder. The cross hatched area is representative of panty hose. The objective is to have my whole head covered by this brain and the only way I can tell if someone is close to me or the only way I feel connections to the outer world are by people coming close and interacting with me. 


This was just a brain model I drew to map out where the parietal lobe is and what it will have as far as LEDs are concerned.


Monday, December 3, 2012

Progress - Brain project

So, I still haven't gotten my technology to start working on yet. I'm getting a tad worried about it, but I'm sure it'll be ok and I'll be able to work with it eventually. Might be last minute, but I'm preparing.

I have my brain partially done, but also I got more materials this weekend for it, so I'm going to work on more of it this week.

Here is some of my brainstorming for the project:


My project - having leds light up a brain in accordance with ambient sounds that go on in a regular day. These sounds can include speaking, outside noises, and other areas of open sound. 

What do i want to show? The interaction between a person and how they perceive the world through sound or auditory response. The connection between the brain and outer actions. How this reaction translates in the brain. 

Light is the key to sight and visual processing as sound is the key to verbal processing. This could be important about concentrating on the experience. 

Language and linkages to the brain: http://library.thinkquest.org/C004367/la4.shtml

I think I like the idea of verbal processing being linked to another form of path making or understanding

How I would like the room set up: I want the person who would be controlling the piece to be in complete darkness and upon speaking or making noise, they are creating a grounds for light. This light would represent the solution to the problem of not being able to see in the space. By visualizing verbal processes we come to see or bring light to a room, causing another solution to visual processing in the brain. 

I might want some kind of path to be made or an organization of this guidance so that I could bring across

On another note: I would also like to possibly expand on what some people were saying for my process critique. I am definitely going to sew smaller channels into the brain to make it look more like what it should, but I will do that after I construct/ sew together the whole thing. Also, I might like to add a piece of the panty hose that encloses the whole face to make it look like the object is just a brain with a body attached instead of a brain attached to a head attached to the body... this might make it more apparent that the idea is for language and communication to be as important as light is to sight in the situation. 

Will definitely attach some sketches and imagery in the next few posts, but for now, here is what I have so far. I really wish my technology would come in soon!!!


Here is a video of what I'm looking to do. I don't believe I've found code and a way to set it up yet, but I'll keep looking.

Link to video of what I would like to accomplish for my project.
http://www.youtube.com/watch?v=RK9d6jKXaBU

I would like this to be connected to my fabricated brain and react to outside sounds. These sound would light up the part of the brain that controls auditory processing.

Monday, November 12, 2012

HYE, KATIRIA, JULIA: SD card+ RTC


 SD CARD


 SD CARD + RTC 


SD card Testing and RTC Time clock exercises

Reading an SD Card for our first exercise.
The layout for the Arduino in Example 1
The serial monitor reading time with the RTC chip.
Another shot of example 1 with SD card, without the RTC chip
 
Finished example 2 with RTC clock chip


Wednesday, November 7, 2012

Project 17 and 18 - Single and Binary Counter Exercise

Here is project 17 and 18 completed:

Project 17 - Single Binary Counter -
Project 18 - Dual Binary Counter -

Final Project Proposal

Form -
My project will consist of a constructed brain made with panty hose material and polyfil. It will be mounted onto a hat or head covering of some sort. Within the brain, there would be LEDs routed to the particular parts of the brain. There will be three main functions or sections of the brain that will light up, connected to three separate sensors. The first sensor will be a range sensor that will light up the parietal lobe of the brain which is associated with movement, orientation, recognition, and perception of stimuli. The second will be a pulse sensor that lights up the brain stem of my piece. The brain stem is often associated with vital life functions such as breathing, heartbeat, and blood pressure. The third and final piece will be a microphone or volume sensor closed to the mouth. This will light up the temporal lobe, which is associated with perception and recognition of auditory stimuli, memory, and speech. This will be installed by having a set of pedestals around the person who is wearing the piece. This person will be blindfolded to block out the one perceptual idea of relation and perception. On these pedestals around the person, there will be noise making objects for the audience to interact with. The audience will also have the option to walk up close to the person and speak to them if they wished.

Here is a source that I got my information from for a more in depth description of the parts of the brain: http://serendip.brynmawr.edu/bb/kinser/Structure1.html

Content -
I want to work with the idea of connection. The definition of connection is 1) causal or logical relation or sequence, 2) contextual relation or association, 3) a relation of personal intimacy (family ties). Within this piece, I want to strip away the main perception of the world by removing the ability of sight. After this is taken away, a sort of hyper reality takes place, causing the person wearing the hat to look beyond visual clues as to the world around them and start contextualizing the world with the sensors that are placed within the brain piece. Sounds can be made around the person that could elevate their heartbeat, causing the brain stem to light up. People could come up close to these people, which not only would set off the lights of the parietal lobe, but also start beeping or making a noise with the closer the audience is to the viewer. And by hearing people's voices or ambient sounds, the participant will simultaneously light up the temporal lobe and begin to wonder what objects are around them. I want to develop a strange connection with the world that is often overlooked because of simple sight.

Method -
I will need to get smaller pedestals to hold the objects in a circular space around the person who will be wearing the piece. I will construct the brain out of panty hose and polyfil and lace LEDs of three different colors in clusters that symbolize their part of the brain. Then I will attach the rangefinder to the front of the brain, the pulse sensor will be a clip to put on your ear on the side of the brain, and and a volume sensor placed by the mouth of the subject or close to the rangefinder. I would hope that the audience would interact with this piece by going up to the pieces and making noise with the objects that the person in focus would then bring together a sense of what's going on in the space. I would encourage the audience to then come up to the blindfolded person with the piece, so as to set the rangefinder off and allow the person blindfolded to know that someone is coming closer to them, developing this connection. In turn, these noises and interactions will cause the change in heartbeat.

Materials -
 - panty hose
 - polyfil
 - rangefinder sensor
 - pulse sensor
 - voice sensor/microphone
 - LEDs - three different colors
 - arduino - possibly multiples
 - pedestals - 4 or 5 depending on layout
 - objects that create sound - not quite sure on what yet.

How is this art? -
I believe this is a positive concept because it asks or more like forces the viewer to reconsider the connections that they take advantage of in everyday life. What connections might be limited by comfort, which might be accelerated by actions (or noise), and how the person may feel about these interactions. It brings to light the connections that we make in everyday life and strangely subverts them because of the reliance on sight for confirmation. This could be also a technological consideration of the life  of a blind person and how they may make connections.


Tuesday, November 6, 2012

Project 34 and 35

Here are the touchscreen projects. I'm sorry for the delay on these, but I was not there on the day that this was done and I was working alone, so it took me a while to realize that the code was wrong and that the wiring was different. Anyways, I gave it a try and was partially successful with project 34 and successful with 35. Here are the videos to show it:

Project 34 - Partially successful -


And Project 35 - successful -

Monday, November 5, 2012

Sunday, November 4, 2012

Project 28 - Stepper Motor

Nisa and I also worked on the code for the stepper motor and here is video evidence for that.

Rangefinder Project

Here is the video for the rangefinder project that Nisa and I completed as well.. I thought I had posted this before. But here it is again.

Digital Pressure Sensor - Chapter 11 Project 31

Here are screen shots of Nisa and I completing the digital pressure sensor examples.


gLCD Example Hello World

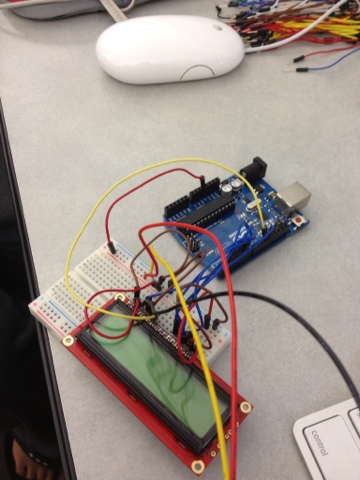
Here is an example of the gLCD working that Nisa and I worked on. It is the Hello World example.


Wednesday, October 31, 2012

Chapter 6, Projects 17 and 18

Nisa and I worked on these two projects together and here are the videos that we had taken of the results.

Project 17 -
Project 18 -

Monday, October 29, 2012

Final Project Ideation

For my final project, I would like to make some kind of a sculpture type object with led lights. I would like for this sculptural object to be a brain. I would form the brain out of panty hose material filled with polyfil or some other sort of filler. I would like to route certain LEDs to different parts of the brain and categorize them to different functions. However, I am stuck on how to make this interactive. I would like the brain to interact to some kind of stimuli, such as talking would light up one part of the brain, while stepping on a bend sensor or exploring an object would light up another area that controls motor functions. I would like to have this mounted on a metal rod or on top of a metal tube with the different color wires exposed to make it look like the spinal column. Again, I feel like I'm going towards making a biological function visually appealing or educational. I want to have this project be a form of interaction and education, but somehow I think this could be more conceptual. I feel like if I attached it to a set of wheels that would move according to where a person stepped on the floor. I think this could be conceptual in the idea of thinking as limitation versus freedom. It would take the viewer time to get this brain sculpture out of an opening within a barrier around the object, such as a square.

This is what I have so far, but I think it might be too difficult.. I need some feedback before proceeding with this idea.

Here is a link to a possible idea of making the object move according to someone's steps:
http://www.makershed.com/product_p/mkseeed8.htm


Thursday, October 25, 2012

Reflection upon the Midterm Project

For our midterm project, I thought the critique went very well. I was very interested in hearing what some of the people had to say and here are a few things I found particularly important.

1) Amy Lobasso and a few others had mentioned the significance of someone being "in front of a crowd" and how she/they in particular are not scared of those types of situations. I thought that it would be a good thing to think about and in going forward in the project (if we were to in the future), we could find a way to make that more clear, or to change the subjectivity of the placing of importance or focus on a person entirely.

2) There was a number of people who had said that they didn't quite understand the imagery and that possibly giving the person a task to show the variations of the heartbeat would be interesting. I agree with this logic because I think it would be cool or better if we would have had them do some kind of karaoke, physical activity, etc. to show the variation and make for a better statement about the project. I also think that the sensor needed to be stabilized more because we were having issues with it towards the end of our project.

3) I also enjoyed the idea of constraining someone and possibly having them confined in a chair or something with a large spotlight on them. This would induce more of the anxiety that we were possibly going for. I wanted for the viewer or the participant to feel uncomfortable, so doing this kind of "interrogation style" of artwork would be interesting for me. Possibly playing with darkness and the only focus would be on the lighted person.

Overall, we had some issues with our project, but we worked through it to create a digitalized manifestation of the heartbeat, a biological function. I think we were successful overall, but with some room for improvement definitely.

Videos for LCD exercises


Here are our exercises for the LCD screen excluding the pressure sensor test. We will be doing that exercise next class. The last video is the thermo sensor test.

Wednesday, October 24, 2012

Final Processing Code


MAIN CODE:

PImage a;  // Declare variable "a" of type PImage

import processing.serial.*;      // this is how we talk to arduino
Serial port;                     // create and name the serial port
int heart = 0;            // used to time pulsing of heart graphic with your heart beat
int pulseRate = 0;        // used to hold pulse rate value sent from arduino 
                          // (beats per minute)
int Sensor = 0;           // used to hold raw sensor data from arduino
int[] pulseY;                 // used to hold pulse waveform Y positions
int[] rateY;                 // used to hold bpm waveform Y positions

boolean beat = false;            // used to advance heart rate graph
boolean newRate = false;         // used to update heart rate display

import processing.video.*;

Capture cam;
PImage img;
boolean newFrame=false;

int z = 0;
int sw = 0;

color black = color(0,0,0,40);
color white = color(255,255,255,0);
int numPixels;

void setup() {
  // Size of applet
  size(screen.width, screen.height);

// find and establish contact with the serial port
println(Serial.list());       // print a list of available serial ports
port = new Serial(this, Serial.list()[0], 115200); // choose the right one in square brackets
port.bufferUntil('\n');          // arduino will end each ascii string with 
                                 // a '\n' at the end (carriage return)
port.clear();                    // flush the serial buffer

  cam = new Capture(this, width, height, 10); // Capture
  // BlobDetection
  // img which will be sent to detection (a smaller copy of the cam frame);
  numPixels = cam.width * cam.height;
  noCursor();
  smooth();
  img = new PImage(80,60); 
  theBlobDetection = new BlobDetection(cam.width, cam.height);
  theBlobDetection.setPosDiscrimination(true);
  theBlobDetection.setThreshold(1.0f); // will detect bright areas whose luminosity > 0.2f;
}


void draw() {
  if (cam.available()) {
    
    cam.read();
    cam.loadPixels();
    int threshold = 95; // Set the threshold value
    float pixelBrightness; // Declare variable to store a pixel's color
    // Turn each pixel in the video frame black or white depending on its brightness
    loadPixels();
    for (int i = 0; i < numPixels; i++) {
      pixelBrightness = brightness(cam.pixels[i]);
      if (pixelBrightness > threshold) { // If the pixel is brighter than the
        pixels[i] = white; // threshold value, make it white
      } 
      else { // Otherwise,
        pixels[i] = black; // make it black
      }
    }
    updatePixels();

    theBlobDetection.computeBlobs(cam.pixels);
    drawBlobsAndEdges(true,true);
    
  }
}


void drawBlobsAndEdges(boolean drawBlobs, boolean drawEdges)
{
  
if (beat == true){
  fill(255,100);
  sw=2;
  rect(0,0,width,height);
  beat = false;      // reset beat flag
      Blob b;
      EdgeVertex eA,eB;
      for (int n=0 ; n<theBlobDetection.getBlobNb() ; n++) {
       b=theBlobDetection.getBlob(n);
         if (b!=null) {
         if (drawEdges) { 
         smooth();
         noStroke();
         //stroke(0);
         //strokeWeight(0);
           for (int m=0;m<b.getEdgeNb();m++) {
           eA = b.getEdgeVertexA(m);
           eB = b.getEdgeVertexB(m);
             if (eA !=null && eB !=null)
             line(eA.x*width, eA.y*height, eB.x*width, eB.y*height);
                }
              }
            }
          }
        }
          
else {
 noStroke();
 }
}


serialEvent tab


/*
Serial data is sent from arduino with leading ascii character 
ascii character tells processing what to do with the data
*/


void serialEvent(Serial port){   
   String inData = port.readStringUntil('\n');  
   inData = trim(inData);             // trim the \n off the end
// leading 'Q' means heart rate data   
   if (inData.charAt(0) == 'Q'){      // following string contains current heart rate  
     inData = inData.substring(1);    // cut off the leading 'Q'
     pulseRate = int(inData);         // convert ascii string to integer
     newRate = true;                  // flag the new heart rate data so it can be mapped onscreen
     return;
   }  
// leading 'S' means sensor data   
   if (inData.charAt(0) == 'S'){      // following string contains raw sensor data
     inData = inData.substring(1);    // cut off the leading 'S'
     Sensor = int(inData);            // convert ascii string to integer
   return;     
   }

// leading 'B' means arduino found a heart beat
   if (inData.charAt(0) == 'B'){          // following strint is time between beats in miliseconds
     inData = inData.substring(1);        // cut off the leading 'B'
     beat = true;                         // set beat flag to advance heart rate graph
     heart = 10;                          // begin heart graphic 'swell' timer 
     return;
   }


}


I know someone was reading the title of the code, but that had nothing to do with the project. It only had "blob" in the title because originally we were using blob detection.