Showing posts with label process. Show all posts

Tuesday, December 15, 2015

Process


My parents had the mat rolled up under the bed for so long I had to use books to flatten it out. 


I was going to try to interlace the pressure sensor through the weaving of the mat itself. I wanted the viewer to look at the sensor but I found that the way in which it was interlacing affected the parameters of the coding too much. Katerie had mentioned to me with my prototype that foam would work better so that there was more variety in the pressure. Charlie suggested the same thing as well. I decided to keep the sensor hidden to keep some of the mystery of how the mat works. I think it works best because the viewer will not know exactly how the piece functions and would focus more on the content


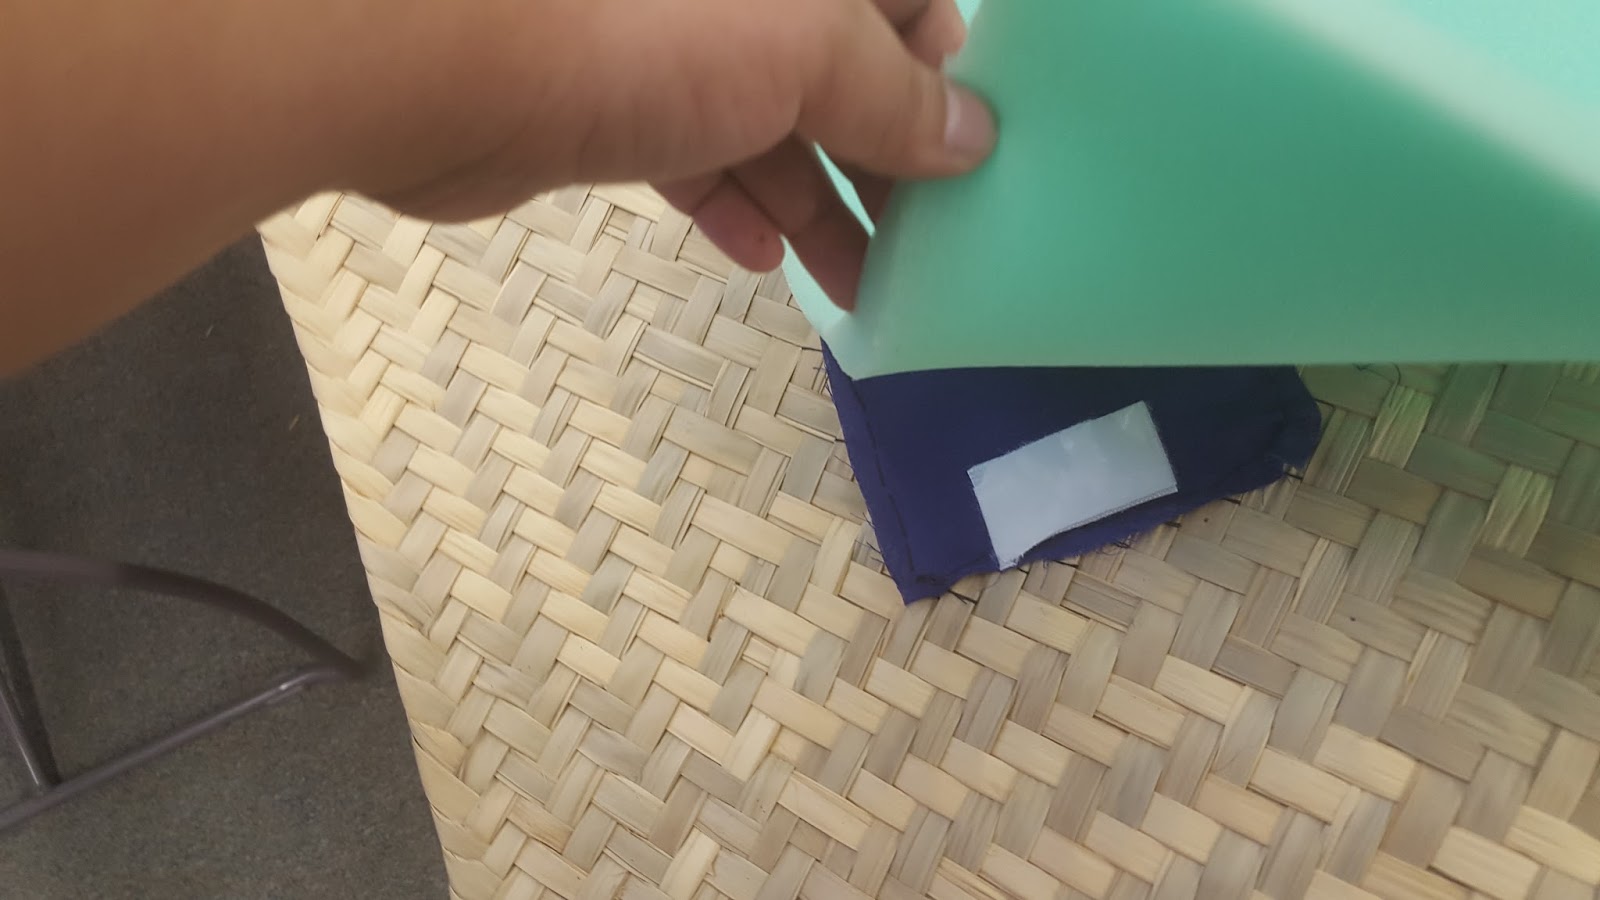
i sewed patches of cloth into the back of the mat. The sewing is unseen from the front of the mat. I didn't want to stick the velcro straight onto the mat because I didn't want to damage it.  


This is how it looks from the front. The stitching is totally hidden :)


Here is a picture of the prototype on a breadboard before I soldered it. 


I plugged a speaker to the wave shield and the piece was installed. I did have a panic moment an  hour before critique because my wires fell apart and my sensor broke. These sensors are so sensitive to falling apart when soldering a wire to them :(  Fortunately I was able to solder it back together and Dreezy gave me a spare sensor she had and it was back to business!!!!!


click here to hear all the sounds on the mat

A problem I encountered with the sound files was that if the bit sample was higher than 16 it would not play. There were two other sounds on the sd card such as roosters and fire sounds that didn't play because of this reason.


Friday, December 11, 2015

12/11 - Semester Project Process post #8 - Jen Herrera

The interface(plush) is currently being built! It's about 60% there I would say. The overall project I would estimate at 80% finished, with a few days left to go.

The housing for the LED matrix and the arduino:


The hidden zipper compartment for the extended life battery:


Embroidered 'touch' area made of conductive thread:
(seen from behind)

As for the content of it, I decided to follow through with my last concept iteration, in which I decided that the matrix should not display any recognizable words or symbols, but should be made of abstract compositions that might invite interpretation. In this way, even if the viewer gathers meaning from the 'cat''s reaction, it is merely the human interpretation of animal thoughts, just like in real life.

Since I wrote about that concept, I have put together 4 compositions that will be displayed on the matrix, one each time that the cat's back is pet.

Compositions:


I think I'm doing well with the time that's left. I just have to keep on sewing and get this thing assembled! :)

Wednesday, December 2, 2015

12/3 - Semester Project Process Post #7 - Jen Herrera

I spent almost three hours soldering this protoshield for myself. My LED matrix previously had 16 jumper wires dangling out of it, and it was causing problems when they came loose. SO now that I have this thing all set up, it's basically plug-and-play. It kinda limits my arduino to this project only when it's on, but that's alright. (shouldn't have put headers in all the pins I wasn't using or should have soldered more slots for wires...oh well. )

Anyways, it works!


One thing I had a huge problem with today was trying to figure out how to make the images on my matrix randomized when the sensor is touched... I really want to make 3-5 compositions, and have the code randomly select one to show when the plush is touched. I'm still currently struggling with this as my biggest obstacle. I'm hoping to have the plush body interface finished this weekend, so then all I should have to do is figure out the random images.

Monday, November 30, 2015

11/30 - Semester Project Process post #6 - Jen Herrera

At this point in time, I'm into the making of my project.
The plush's body is a work-in-progress; the body pattern is drafted and the head pattern will be finished soon.

More important than the physical is the electrical; I have all the pieces I need now. My usb power supply arrived today:
It's pretty large, so I need to make sure that I leave room for it in the final design. I'm looking forward to the fact that my project will be self-contained though! For the matrix, I just need to solder up a protoshield with its various connections so that it will be a plug-and-play sort of function. I have the protoshield in my mailbox and found a tutorial on soldering it for the matrix:
https://learn.adafruit.com/32x16-32x32-rgb-led-matrix/connecting-using-a-proto-shield

For my concept, the content of the matrix when the plush is touched is the most important thing. Last mini-crit, it was suggested that I look into animal communication research and I thought that maybe I would find some imagery to use in there. After researching, I found that the most interesting part of the articles were sections that said 'The cat was very concerned with the owner's emotions, researcher said.' In the end, we can observe interspecies communications all day long, but we are still making conclusions about them as humans, and are never able to fully understand how another animal is interpreting the situation.

Using this idea, I decided I'm going to simplify things and use the mechanics of the matrix to my advantage. It draws shapes very much like processing does, so it will be easy for me to draw various compositions of line and shape. Like abstract painting, it will be up to the viewer to try and interpret the shapes; or otherwise not try to interpret them. These composed reactions will be randomized in the order they show up, how long they last, and whether or not they blink. The 'emotions' of the 'animal' will remain a mystery, even if the viewer thinks that they have figured it out. 

Wednesday, November 18, 2015

11/18 Semester Project Process post #5 - Jen Herrera

After our prototype crit the general consensus was that my plush should be more realistic to better communicate interspecies communication. For this, I ordered some faux fur fabric to construct the toy out of. My main concern with using long fur was that a patch of conductive fabric, like I meant to use with short plush fur, would look like an ugly bald spot in the middle of the plush.

That's why for my second mini project I was investigating using the conductive thread for capacitive touch. My theory was that if I could sew rows into the fur, parting it where I sewed and then brushing the fur back over it, that I could get capacitive touch action that was nearly undetectable to the eye.

My fur came in this week and I got to work testing; good news, with a very low threshold (to make up for the lack of direct contact due to the fur) it works!

Video:

I'm super thrilled about this. I think it will look SO much better than the short pile fabric with patches of rough, unpleasant conductive thread. Concept wise, I love that the signal comes from just touching the fur of the 'animal' with no visible interface. It'll be so much closer to petting a cat and getting a reaction out of it!

I also found a free-to-use cat pattern in the general shape I was going to design one in. So I'm going to save myself a little time and just tweak that pattern since it's nearly an exact image of what I want.

Monday, November 16, 2015

Mini Project 2, Process 3 - Jen Herrera

 A very process-oriented post, documenting the many steps I've taken to try and make this mini-project work.

The first thing I did was take the capacitive touch knowledge that I gathered from building my LED Matrix prototype, and use that to try and make one of my crochet flowers into a capacitive touch sensor. When touched, it's supposed to turn the light off!
Like in my prototype, using only one sensor, it works perfectly!
 

So then, using a tutorial for making a capacitive touch piano, I sketched up what my wiring/ sewing circuit should look like. It gets really confusing when you add more sensors and have to translate all the wires into stitches that can't overlap..

And then I began sewing them in.

When put together, all of the lights work!

My only problem is that the capacitive touch can behave erratically, sometimes not turning off and then turning off after a long delay. Individual flowers don't usually turn off but work in a chain reaction from the first or second flower. I need to go back over everything and maybe look further into my code.

Saturday, November 14, 2015

Mini Project 2, Process post 2 - Jen Herrera

After some thought and reading, I decided I'm going to make my second mini project about touch and consequence. Often we are compelled to touch things, a flower, animal, object, artwork that perhaps we shouldn't, but we act on the need anyways. For this project I will make a small textile piece with crochet flowers and LEDs. The soft, fuzzy, colorful flowers should invite the viewer to touch them. This will send a signal through the conductive thread that will be woven into the petals (acting as a capacitive touch sensor), and turn off the LED that was lit up in the flower's center. So by touching it, you have 'killed' the flower. Trying to touch it again to bring it back will not yield a result, as once the damage is done, it cannot be undone. After a while (?) of no interaction, the flowers will reset for another person to interact with.

Concept sketch:


Test crochet, and test of conductive thread crochet (hint: it doesn't work. Yarn it is!)

Mini Project 2, Process post 1 - Jen Herrera

I'm still trying to pull together an idea for my second mini project. I think that because my final project is focusing on touch and communication, that I'd like to explore these topics further in my second mini project.

For touch, I really want to examine the idea of being allowed to touch, or whether or not we should touch something. This could go beyond physical touch perhaps and be connected with the idea of intervention; whether or not your unsolicited touch/intervention is required in a certain situation. If something invites us to touch it, does that mean that we should?

For communication, I would specifically start further research on inter-species communication. I'm not sure how that would evolve into a small project yet since I'd have to see what I find interesting first.

Overall, I want to use one of the lilypads and make another soft circuit. I like regular arduino uno work, but I really enjoy sewing the circuits like I did in my first project. This is especially fitting for projects dealing with touch, as textile have an inherent textile invitation to the viewer. As for the medium to invite the touch, I'm thinking I will most likely sew something simple or do a little bit of crochet. I'm always up for adding craft in to my artwork.

Sunday, November 8, 2015

11/9 - Semester project Process #4 with Protoype

My first go at a prototype:

In this test I got both the LED Matrix to work, as well as a conductive fabric capacitive touch sensor. It took a lot of research just to hook up the fabric, and once it was done I had to mash a bunch of code together. I ended up finding some code on how to make a capacitive touch piano out of tin foil. I also took the code to draw on the matrix from the library that I downloaded for it (It's looking surprisingly like drawing shapes in processing!). I cut up the two codes and mashed them together so that instead of playing a note when the 'key' is hit, it draws to the matrix.

Some concerns of mine are that this is definitely an arduino uno project and there are a ton of wires flopping around, sometimes getting loose and being unpredictable. I believe I'll have to put together a proto shield or something like that to make running the matrix more stable. As for the fabric sensors, I still want them to be sewn in with conductive thread, so I will have to experiment with securely fastening resistors into the thread and a way to turn the thread into a 'wire' at the end... maybe some sort of tie-in plug or pin for when it comes to attaching the arduino.

There's a lot of problem solving to do yet, but I'm happy with my progress so far.
I still need to ponder further the meaning or content of what will show up on the matrix, but I just wanted to get it working first!

11/8 - Semester Project Process post #3- Jen Herrera


I got my LED Matrix up and running! It definitely has to be driven off of the Arduino Uno, so I'm re-thinking my setup for my project. I really want to use the lilypad for the conductive fabric and thread, but now I'm not sure how the two arduinos will be able to talk to one another. I might have to look into making the fabric work with the Uno instead.

Either way, I want the project to be self-contained in the plush toy, which leads me to the power source realization. For my smaller lilypad projects, I was using the 3V battery that came with the protosnap set. The LED matrix definitely needs a 5v power supply that can draw up to 2A. There are regular battery packs that can accomodate this, but I'm worried about the life of them. My 3v battery died surprisingly fast with just my small blink LEDs for mini project 1. I found a battery pack meant for powering tablets and pis that I think will do the job.

Now to finish up my prototype!

Saturday, November 7, 2015

Process: Real Time Clock

For my project I am creating a synthesizer...visual synthesizer

In order to do this one of the components is creating a real time clock.
Which I have done and documented below....


Wednesday, October 21, 2015

10/21 - Semester Project Process #2 - Jen Herrera

Since proposing my semester project, I've been focused on gathering a list of the materials I need to construct it. My first mini-project was a good exercise in working with conductive thread. I made plenty of mistakes and was able to fix them in time, so I hope that learning from those mistakes will save me trouble when I work on the final plush. I still have a lot of bits to work out, and I'm especially nervous about the LED Matrix and hooking that up. I don't think coding that will be difficult, but I have no idea how wiring that will go. I want to get a matrix in the mail before the 2nd mini project so that I can start working for it.

At the moment I need to:
1. Order supplies
2. Figure out how each component will work seperately
3. Make a mock-up pattern for the plush interface.

Conceptually, I need to tighten up which direction I want to go. When you touch the sensors on the plush, will it work predictably? Be frustrating and random? Or be unexpected but systematic?

10/21 Kayla Evans Project Process

As process for there sketch of my project, I've started taking apart two hourglasses and planning different forms of the second sketch, as well as researching different artists. I am also preparing to take apart a projector to figure out how it works.

Monday, October 19, 2015

10/19 Kayla Evans Mini-Project 1 Process

One of the first steps I took when creating this project was going back and completing the LED nightlight exercise; this helped me understand the range of colors that could be created using the LED, and the neccesary code that went with these colors:

I then tested my accelerometer, by having it print numbers to the serial port depending on the angle of the tilt; I used code from Arduino's website for this test:

I then figured out the way in which the numbers for the x axis and y axis increased and decreased depending on the angle of the tilt (left, right, forward, and backward), and linked these numbers to the color that was created by the LED, since analog numbers controlled the color of my LED.

I started creating the box from glass and plexiglass:

Final documentation of my completed mini-project:

Saturday, October 10, 2015

10/10 Mini Project Process, Jen Herrera

Some WIP of the work I've gotten done on it today:
Just testing lights:
LEDs and light sensor embroidered with conductive thread:

10/10 Semester Project process work

10/10 process work

We drew more sketches of what our final installation piece may look like, and after searching through adafruit we decided that using a PIR motion sensor would be more practical for our concept rather than an IR proximity sensor.

If only I had realized this sooner so I could work with this for my mini project. For now I will continue to use the IR sensor.

PIR Motion Detector: https://www.sparkfun.com/products/13285

Here is an example of how the PIR motion sensor can work with a motor:
http://www.instructables.com/id/Motion-Activated-Servo/step3/Code/

We want the sensor to activate the motors for a certain period of time as soon as the person is detected, so we think this PIR motion detector would be more simple and easier to work with for the results we want.  We would like the person to experience the installation moving as soon as they enter, so they feel more like they are invading and agitating the space. Like it comes alive as soon as they penetrate it.

Tuesday, October 6, 2015

10/6 - Semester Project Proposal and Process #1 - Jen Herrera

Process Post:
I didn't have anything concrete for my semester project until this proposal, so I'm in a much better place as far as the project goes. There are still aspects about it's form and content to consider, but I will definitely be making an interactive plush toy that uses conductive thread and fabric to act as touch capacitive sensors.

A demo that I saw here:
https://learn.adafruit.com/capacitive-touch-with-conductive-fabric-and-flora/overview

----
Proposal:
[Presentation Link]